Triangle shawls can be knit in many different directions – top down, bottom up, and side to side (in so many different ways!). One of the simplest ways is to start at the bottom point by casting on just a few stitches and increasing along the edges – working from the bottom to the top. It’s really a simple way to work a triangle shawl – even for newer knitters. And, because the construction is so simple it’s really easy to add interesting texture or stitch patterns too.
To knit a bottom up triangle shawl:
- Cast on a few stitches.
- Work an increase along each edge (on the right-side rows only or on the right-side and wrong-side rows)
- When it’s as deep and as wide as you want, bind it off.
While these are the very basic instructions, there are lots more things to consider (and plenty of things you can do to make it even more interesting).
Construction of a Bottom-Up Triangle Shawl
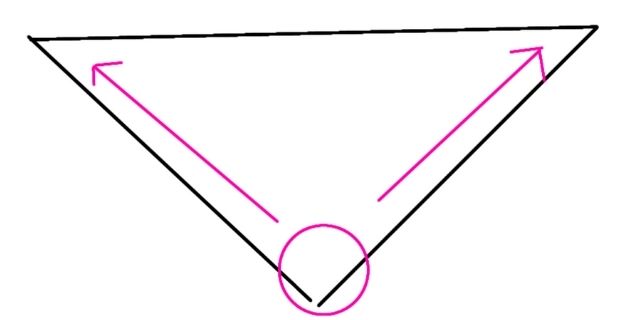
A triangle shawl that starts at the bottom point begins by casting on a few stitches (just three is enough, but you could certainly cast on more if you like), knitting each row, and working increases along both edges. When the triangle shape is as deep as you want, just bind off. The image below demonstrates this basic process:

You can easily change the depth of the shawl by adjusting the rate of increasing along the edges.
- For a standard triangle shawl, work increases at each edge on just the right-side rows.
- For a shallower triangle (and a longer wingspan), work increases at each edge on both the right-side and wrong-side rows.
The best way to determine what final shape you like is to knit a small sample swatch. Personally, I prefer a shallower shawl with a long wingspan (they are nice to wrap around yourself – almost like a scarf) so I work increases on every row.
Knitting Instructions for a Bottom-Up Triangle Shawl
Here are the basic instructions for a Garter stitch triangle shawl worked from the bottom-up:
- Cast on 3 stitches.
- Set-up row: Knit 1, increase, knit 1, increase, knit 1.
- Row 1 (WS): Knit.
- Row 2 (RS): Knit 1, increase, knit to last stitch, increase, knit 1. (2 stitches increased)
Repeat Rows 1-2, using the increase of your choice, knitting until the shawl has reached the desired depth. Of course you can change the depth by changing the rate of increase (increase every row for a shallower triangle with a longer wingspan).
If desired, work a few rows without increasing (work straight on RS and WS rows) if you want the shawl tips to be a little deeper.
When it is as deep as you like bind off all the stitches.
It’s really that simple – but there’s so many ways you can play with the shape once you understand its basic construction.
Get the Pattern

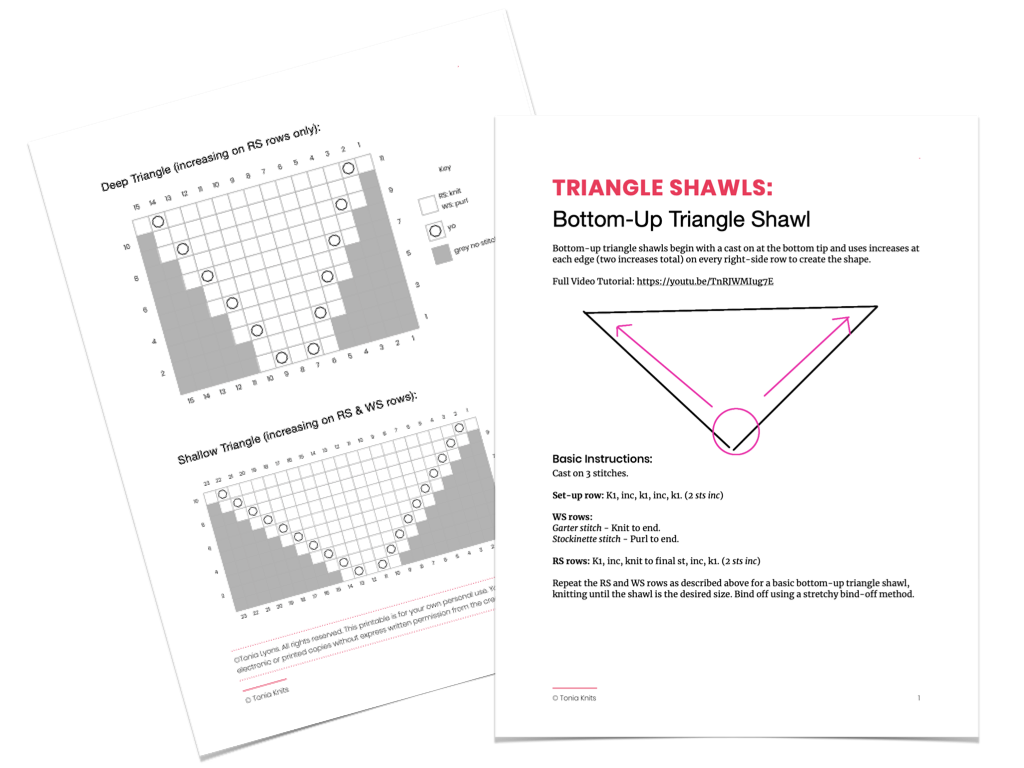
Fill in the form below to get access to the FREE Resource Library – and get a copy of the Bottom-Up Triangle Shawl pattern ‘recipe’.
Tips for Modifying the Pattern
The directions above creates a Garter stitch bottom-up triangle shawl (since you’re knitting every row). To work in Stockinette, simply change the instructions for the wrong-side rows.
One thing to note – Stockinette tends to curl so be sure to add a small border to both edges to keep the Stockinette from rolling (a few stitches of Garter stitch at each edge should do the trick).
Replace the wrong-side rows with this instruction and you’ll have a shawl with a Stockinette body and a simple 3-stitch Garter edge:
- Row 1 (WS): Knit 3, purl to final 3 stitches, knit 3.
Just that one simple change creates a completely different shawl.
Another option is to cast on the full amount of stitches at the bottom edge of the shawl. Then you would decreases at each edge and along the center to decrease down to just a few stitches. This is a great option if you want to work some kind of border pattern along the edge. You can determine how many stitches you need for the border, cast on the full amount, knit the border, and create the shawl shape at the same time.
Adding Color & Texture
Besides adjusting the background stitch, the easiest adjustments to make are color and simple texture.
Add interest with color by:
- Choosing a gradient yarn that will do all the color changing for you.
- Working small or wide stripes in Garter stitch.
- Fading from one color to another, alternating between colors at intervals to ‘fade’ from one color to another.
- Adding a few small sections of a simple slip-stitch or Mosaic pattern.
You can also add texture easily by working eyelets along one edge or at set rows along the body of the shawl. Or alternate sections of Garter stitch with sections of Stockinette. This doesn’t really require any extra preparation. But if you want something a little more involved, try adding a stitch pattern (see the next section for more information).
Adding a Stitch Pattern
While a simple Garter or Stockinette shawl can be beautiful, sometimes you might want something with a little more interest. Because the increasing is happening at the edges, it’s simple to add an interesting textured stitch pattern – something simple like sections of eyelets, or even cables or lace patterns.
Once you’ve chosen your stitch pattern, center it from the bottom point of the shawl as you add the stitches. Once the new stitch pattern is established, work the new stitches that are added when you work your increases into the stitch pattern. This will help you maintain the pattern as much as possible.
This is another good time to try a swatch to make sure it will work out the way you want. It’s also a good idea to use charting software or even graph paper to draw it out to make sure the stitch pattern will work the way you want it to.
Discover the Confidence You Need to Fix Your Knitting Mistakes

By the end of this six-part self-paced course, you’ll be able to read your knitting, recognize a variety of knitting mistakes, and understand how to fix them.
Charting a Bottom-Up Triangle Shawl
If you want to use a more involved pattern like cables or lace, then charting out the design to see how it will look is a good idea. The image below shows how a basic Stockinette background would look – and how you could use that space to add a stitch pattern. There are a few ways to add a pattern stitch:
- Work in your preferred background stitch (like Garter or Stockinette) until you have enough space to incorporate a full repeat of the stitch pattern you’ve chosen.
- Figure out how to add partial repeats of the stitch pattern to fill in more of the background space.
- For an all-over pattern, make a large grid with the stitch pattern and add the shape of the shawl over the top.
A chart is really a great way to work out any stitch pattern, because it gives you a visual of how the finished shawl will look and it gives you some space to experiment and try out a stitch you might not have considered. You can get a free copy of the charts below for your own experimentation – just fill out the form above.
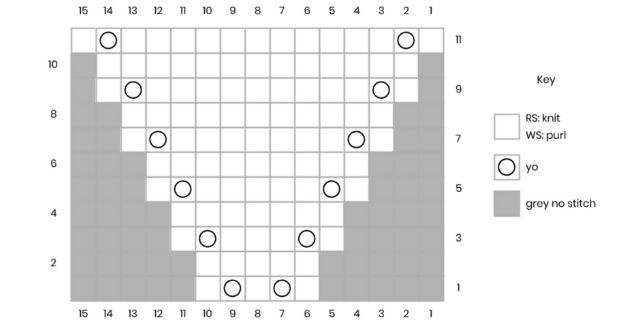
Standard Bottom-Up Triangle Shawl
This chart demonstrates the standard shape of this shawl – with increases worked along the right-side edges only. This chart shows a basic Stockinette body (with no edge stitches) and yarn overs used for the increases. If you have an idea for a stitch pattern, you could draw it right onto the chart to see how it would look.

Bottom-Up Triangle Shawl with a Wider Wingspan
The chart below also uses a background of Stockinette stitch with yarn overs used as increases. But this time, the increases are worked at each edge on both the right-side and wrong-side rows. As you can see, changing this rate of increase dramatically changes the final shape of the shawl. Like the chart above, you can sketch out your stitch pattern directly onto the shape to see how it would look.

Estimating Yarn Yardage for Your Shawl
Now that you’re ready to knit your own bottom-up triangle shawl, you’ll need to get some yarn and start knitting (sometimes shopping for yarn is just as fun as the actual knitting!). The table below will give you a rough estimate for the amount of yarn you’ll need. The smaller number will create a small shawlette and the larger number will create a larger wrap.
| Yarn Weight | Yardage Estimate |
|---|---|
| Fingering [CYC 1 – Super Fine] | 500-800 yards |
| Sport [CYC 2 – Fine] | 450-750 yards |
| DK [CYC 3 – Light] | 400-700 yards |
| Worsted [CYC 4 – Medium] | 350-600 yards |
If you have one precious skein of yarn and you want to use as much of it as possible, this is a good shawl shape to use. Keep knitting from the bottom up until it looks like you’re getting low on yarn. When you start the next row, measure out about a yard and put a slipknot at that point.
Measuring out a yarn is really simple to do – just hold the yarn attached closest to your knitting to your nose and pull a length of yarn out, reaching out to the side with it (as far as your arm will reach). Use that rough length of yarn as your own ‘one yard’ measurement. Don’t forget to put a slipknot.
As you knit, keep an eye out for that slipknot and how far into the row you’ve worked. You can use this information to form a rough estimate of how many yards you need to complete one row. Just keep knitting until you’ve used up most of the yarn (remembering to leave enough to bind off).
As far as the fiber content of the yarn, the world is your oyster. Wool or alpaca are a great choice for a warm and cozy shawl. A silk and wool blend will drape beautifully (and would really set off a beautiful lace stitch pattern). Or try a plant fiber like pima cotton or bamboo for a lightweight summer shawlette.
It’s time to start knitting your own bottom-up triangle shawl! If you need a little more inspiration, here’s an article that features ten patterns that use this construction method: 10 Interesting Bottom-Up Triangle Shawl Knitting Patterns.
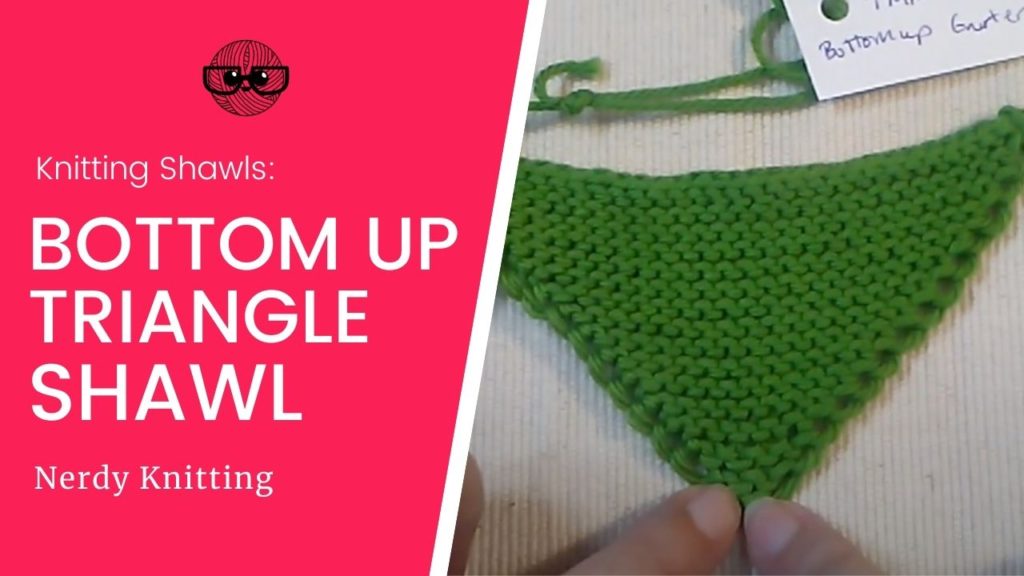
If you want to see this basic construction method in action, watch this video:
Links below are affiliate links. If you click through and make a purchase I may make a small commission at no extra cost to you. See the Disclosure for more information.
Recommended Resources for Shawl Knitting
- Custom Shawls for the Curious & Creative Knitter by Kate Atherley and Kim McBrien Evans (available on Amazon)
- Knit Shawls & Wraps in One Week by Marie Greene (available on Amazon)
- The Magic of Shetland Lace Knitting by Elizabeth Lovick (available on Amazon)
- Knitting Modular Shawls, Wraps & Stoles by Melissa Leapman (available on Amazon)
More Articles about Knitting Triangle Shawls
- 10 Knitting Patterns for Sideways Triangle Shawls (knit tip to tip)
- 12 Beginner Shawl Knitting Patterns
- How to Knit a Triangle Shawl Sideways from Tip to Tip
- How to Knit an Asymmetrical Triangle Shawl (Two Ways!)
