Triangle shawls are popular among knitters – with good reason. There are so many different ways to knit them! One popular method is the asymmetrical triangle shawl (and there’s actually two different ways to create them).
Both methods for knitting an asymmetrical triangle shawl start with just a few stitches. Increases are used to create the triangle shape. It’s a great construction method even for new shawl knitters because it’s so simple.
To knit a simple asymmetrical triangle shawl:
- Cast on three stitches.
- Work a set-up row: Knit 1, increase, knit 2.
- Next row (and all WS rows): Knit
- RS Rows: Knit 1, increase, knit to end.
By following even these simple instructions, you can knit a basic asymmetrical triangle shawl. But there are actually more things to think about (and another fun way to knit this shawl shape).
Construction of an Asymmetrical Triangle Shawl
There are actually two ways to knit an asymmetrical triangle shawl. One method is described above – where increases are worked along one edge until the shawl is as wide as you like. The second method uses double increases and a decrease to create a variation on the shape. We’ll take a deeper look at each of these construction methods below.
Sideways Triangle Shawl
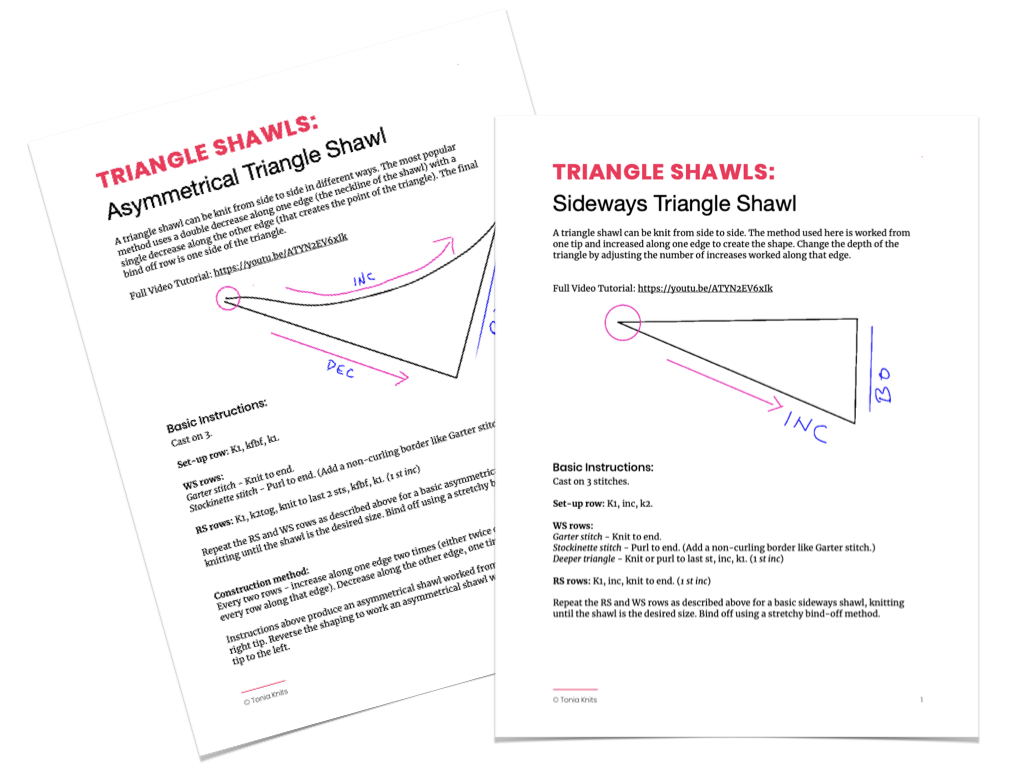
A sideways asymmetrical triangle shawl starts at one point by casting on a few stitches (just three is enough, but you could certainly cast on more if you like), knitting each row, and working increases along one edge. When the shawl is as wide and deep as you want, just bind off. The image below demonstrates this basic process:

It’s really simple to change the depth of the shawl by changing the increase rate.
- For a standard sideways triangle shawl, work an increase at one edge on every right-side row.
- For a shallower triangle (and a longer wingspan), work increases every other right-side row.
- For a deeper triangle, work increases along the same edge on both the right-side and wrong-side rows.
Just by changing how often you increase, you can change the shape. If you like a shallower triangle with a long wing span (my favorite type – it’s almost like a lovely scarf that you can wrap around your neck – but more interesting to knit). The best way to decide what you like is to knit a sample swatch of each method.
Knitting Instructions for the Sideways Triangle Shawl
Here are the basic instructions for a Garter stitch sideways triangle shawl:
- Cast on 3 stitches.
- Set-up row: Knit 1, increase, knit 2.
- Row 1 (WS): Knit.
- Row 2 (RS): Knit 1, increase, knit to end. (1 stitch increased)
Repeat Rows 1-2, using the increase of your choice, knitting until your shawl is as wide and deep as you like. But, like I mentioned in the previous section, you can change your shawl by adjusting the rate of increase (work increases every other row for a shallow, long triangle or add an extra increase/work an increase on wrong side rows to create a deeper triangle).
When it is as deep as you like bind off all the stitches.
It’s really that simple – but there are plenty of ways to make it more interesting.
Modifying a Sideways Triangle Shawl
The instructions above creates a Garter stitch sideways triangle shawl (knitting every row). To knit your shawl in Stockinette, you need to change the instructions for the wrong-side rows.
One thing to note – Stockinette tends to curl so be sure to add a small border to both edges to keep the Stockinette from rolling (a few stitches of Garter stitch at each edge should do the trick).
Replace the wrong-side rows with this instruction and you’ll have a shawl with a Stockinette body and a simple 3-stitch Garter edge:
- Row 1 (WS): Knit 3, purl to final 3 stitches, knit 3.
Just that one simple change creates a completely different shawl.
To work this instruction you’ll need nine stitches – until you have those nine stitches, just keep working in Garter stitch (knitting every row) until you have enough stitches. Then you can start working in Stockinette along the middle portion.
The video below explains the process in more depth.
And, the other two ways to modify the shawl is by changing the rate of increase. If you want a shallower, longer shawl, work the right-side row instructions but only increase every other right side row. You’ll work fewer increases so the triangle will be shallow.
Now, if you want a deep triangle, work this wrong-side row instruction instead:
Row 1 (WS): Knit to last stitch, increase, knit last stitch. (1 stitch increased)
Just by changing a few simple instructions you can change the fabric and the shape.
Now let’s take a look at how we can change the shape a little bit more to knit an asymmetrical triangle shawl.
Asymmetrical Triangle Shawl
This construction method is probably one of the most popular (at least one shawl using this construction can usually be found on Ravelry’s Hot Right Now section). It takes a sideways triangle shawl and makes a few simple changes to create a fun shape that sits on the neck in a really nice way.
An asymmetrical triangle shawl starts much the same as the sideways triangle shawl above – by casting on a few stitches (just three is enough, but you could certainly cast on more if you like). But, instead of just a single increase worked along one edge, a double increase is worked along that edge and then a single decrease is worked along the other edge. This method creates the shape shown here:

Instructions for an Asymmetrical Triangle Shawl
For a basic Garter stitch asymmetrical triangle shawl:
- Cast on 3 stitches.
- Set-up row: Knit 1, KFBF, knit 1.
- Row 1 (WS): Knit.
- Row 2 (RS): Knit 1, k2tog, knit last 2 stitches, KFBF, knit 1. (1 stitch increased)
Repeat Rows 1-2, to create the asymmetrical triangle shape.
If you’re curious to know how and why this works, here are a few things to note – the decrease cancels out one of the increase stitches so you are still only increasing by one stitch when you work every two rows. That creates the triangle shape. The curved neckline of the shawl is created because you’re working two increases along that edge – it adds extra fabric along one side.
When your shawl is as big as you’d like, bind off along the third edge of the triangle.
If you want to modify the fabric, you can certainly work this shawl in Stockinette as well. Just purl the wrong-side rows instead of knitting them (be sure to add a few stitches of Garter stitch or other non-curling pattern to keep the edges from curling in).
Get the Patterns

Fill in the form below to get access to the FREE Resource Library – and get a copy of these Triangle Shawl pattern ‘recipes’.
Adding Stitch Patterns & Texture
Both of these shawls can be further adjusted by adding some texture, color, or an interesting stitch pattern.
Here are a few ways to change the shawl by changing the yarn choices:
- Choose a gradient yarn that will do all the color changing for you.
- Work small or wide stripes in Garter stitch.
- Fade from one color to another, alternating between colors at intervals to ‘fade’ from one color to another.
- Add a few small sections of a simple slip-stitch or Mosaic pattern.
An easy way to add texture is by working at set intervals along the body of the shawl (eyelets are worked by working paired yarn overs and decreases across the row). You could also add texture by alternating sections of Garter stitch with sections of Stockinette. This doesn’t really require any extra preparation. But if you want something a little more involved, try adding a stitch pattern (see the next section for more information).
Stitch Patterns for Asymmetrical Triangle Shawls
Garter stitch is the easiest choice for this type of shawl (Stockinette is also a good choice). But sometimes you might want something with a little more interest. Because the shaping only occurs along the edges, it’s simple to add an interesting textured stitch pattern – something simple like sections of eyelets, or even cables or lace patterns.
First, choose your stitch pattern. Then think about how you’d like it to fit into your shawl shape. Do you just want one textured stripe down the center. Or perhaps you want to work in Garter stitch until the shawl is a certain size then change to a textured pattern along the final third of the shawl. There are many ways to create a new shawl just by changing how the stitch pattern fits into the asymmetrical shape.
This is another good time to try a swatch to make sure it will work out the way you want. It’s also a good idea to use charting software or even graph paper to draw it out to make sure the stitch pattern will work the way you want it to.
Charting the Shawl
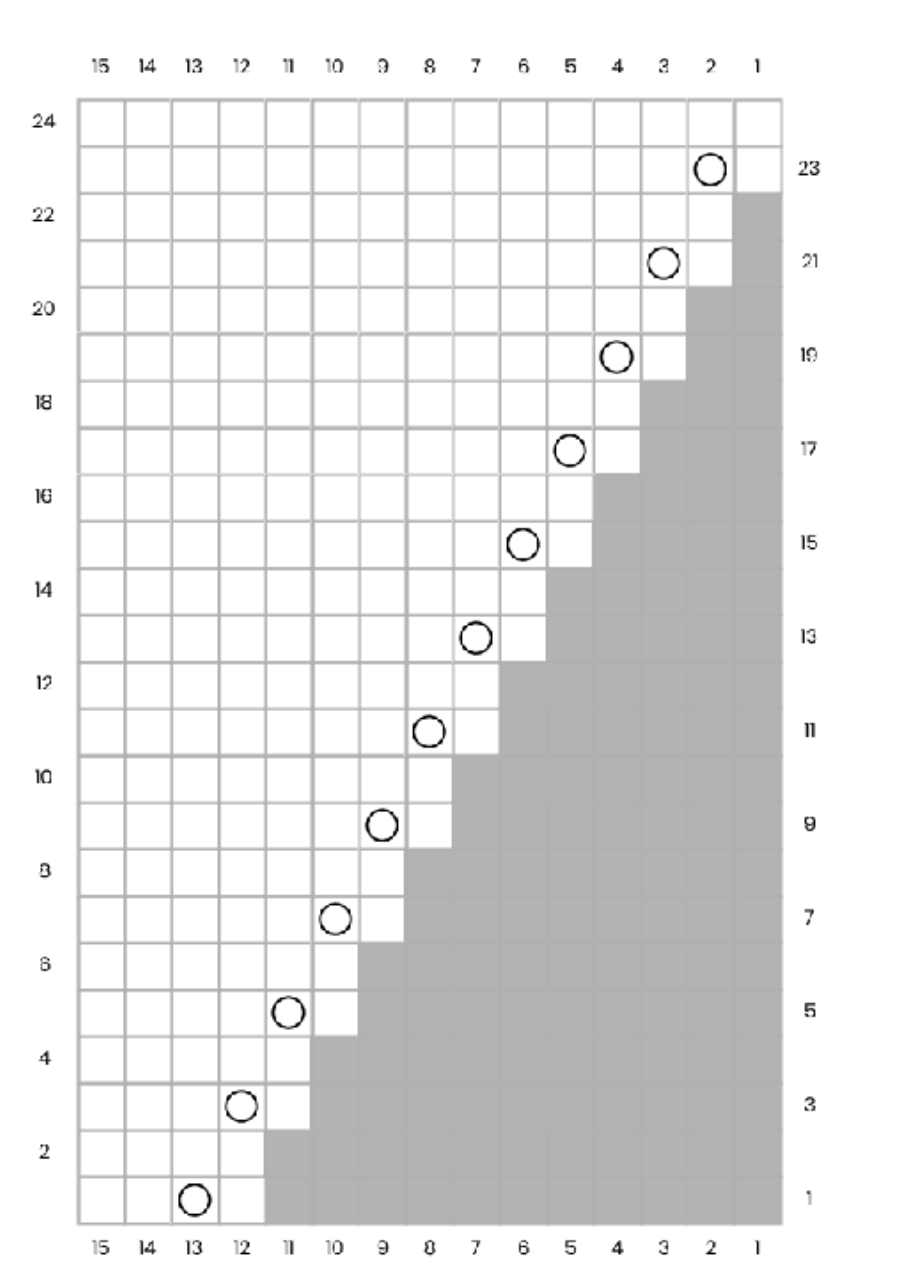
The best thing you can do is chart the pattern if you want to add something that’s a little more complicated. That way you’ll be able to see how it will fit into your shawl shape. In the two charts below, you can see the basic construction for both shawl shapes. All you need to do is add your stitch pattern into the chart by sketching it in to see how it will look.
There are a few ways to add a pattern stitch:
- Work in your preferred background stitch (like Garter or Stockinette) until you have enough space to incorporate a full repeat of the stitch pattern you’ve chosen.
- Figure out how to add partial repeats of the stitch pattern to fill in more of the background space.
- For an all-over pattern, make a large grid with the stitch pattern and add the shape of the shawl over the top.
A chart is really a great way to work out any stitch pattern, because it gives you a visual of how the finished shawl will look and it gives you some space to experiment and try out a stitch you might not have considered. You can get a free copy of the charts below for your own experimentation – just fill out the form above.
Sideways Triangle Shawl Chart
The chart below shows the simplest sideways triangle shawl – a simple yarn over is worked along the right-side edges only and the shawl fabric is basic Stockinette (with no edge stitches). If you have an idea for a stitch pattern, you could draw it right onto the chart to see how it would look.

Asymmetrical Triangle Shawl Chart
The chart below shows how an asymmetrical triangle shawl would look. This is a variation on the instructions above – instead of working a double increase on the right-side rows, increases are worked along that edge on both the right-side and wrong-side rows. This is paired with a single decrease along the other edge of the shawl.
It is more difficult to add a stitch pattern to this shawl shape because both edges are changing, but it’s not impossible.

This shawl shape is popular for a reason – they are interesting to work and there are a variety of ways to add interest with color and texture.
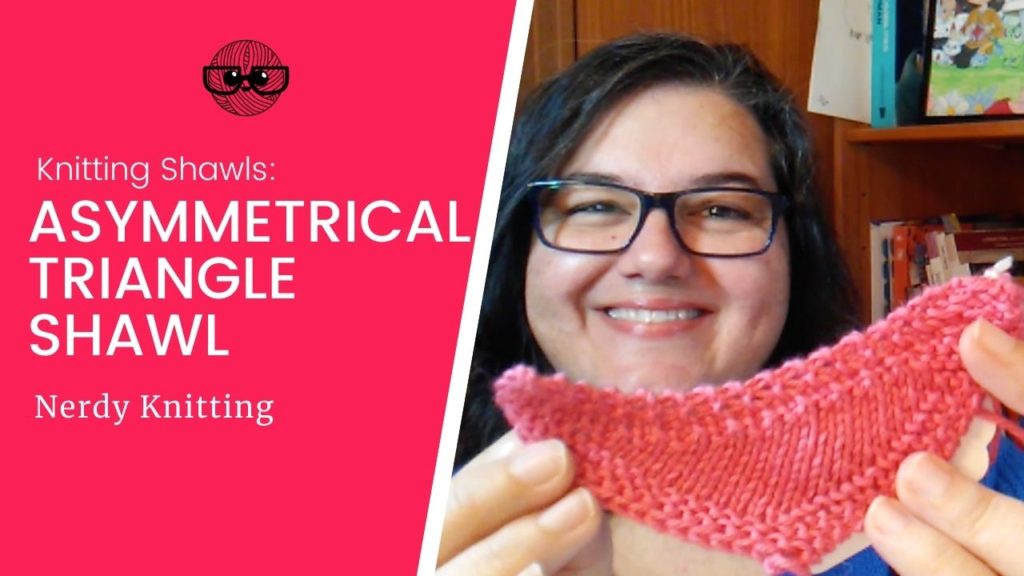
Learn more about both of these shawl construction methods in this video:
Links below are affiliate links. If you click through and make a purchase I may make a small commission at no extra cost to you. See the Disclosure for more information.
Recommended Resources for Shawl Knitting
- Custom Shawls for the Curious & Creative Knitter by Kate Atherley and Kim McBrien Evans (available on Amazon)
- Knit Shawls & Wraps in One Week by Marie Greene (available on Amazon)
- The Magic of Shetland Lace Knitting by Elizabeth Lovick (available on Amazon)
- Knitting Modular Shawls, Wraps & Stoles by Melissa Leapman (available on Amazon)
More Articles about Knitting Triangle Shawls
- 10 Knitting Patterns for Sideways Triangle Shawls (knit tip to tip)
- 12 Beginner Shawl Knitting Patterns
- How to Knit a Triangle Shawl Sideways from Tip to Tip
