
If you’ve ever knit a sweater and thought, “Why doesn’t this fit quite right?” — you’re not alone. One of the biggest mistakes knitters make is choosing a size without understanding how the sweater’s construction impacts fit.
Let’s fix that. We’re diving deep into drop shoulder sweaters — one of the most popular and beginner-friendly constructions out there. We’ll explore how they’re built, the key measurements you need, and how to ensure a great fit every single time.
What Is a Drop Shoulder Sweater?
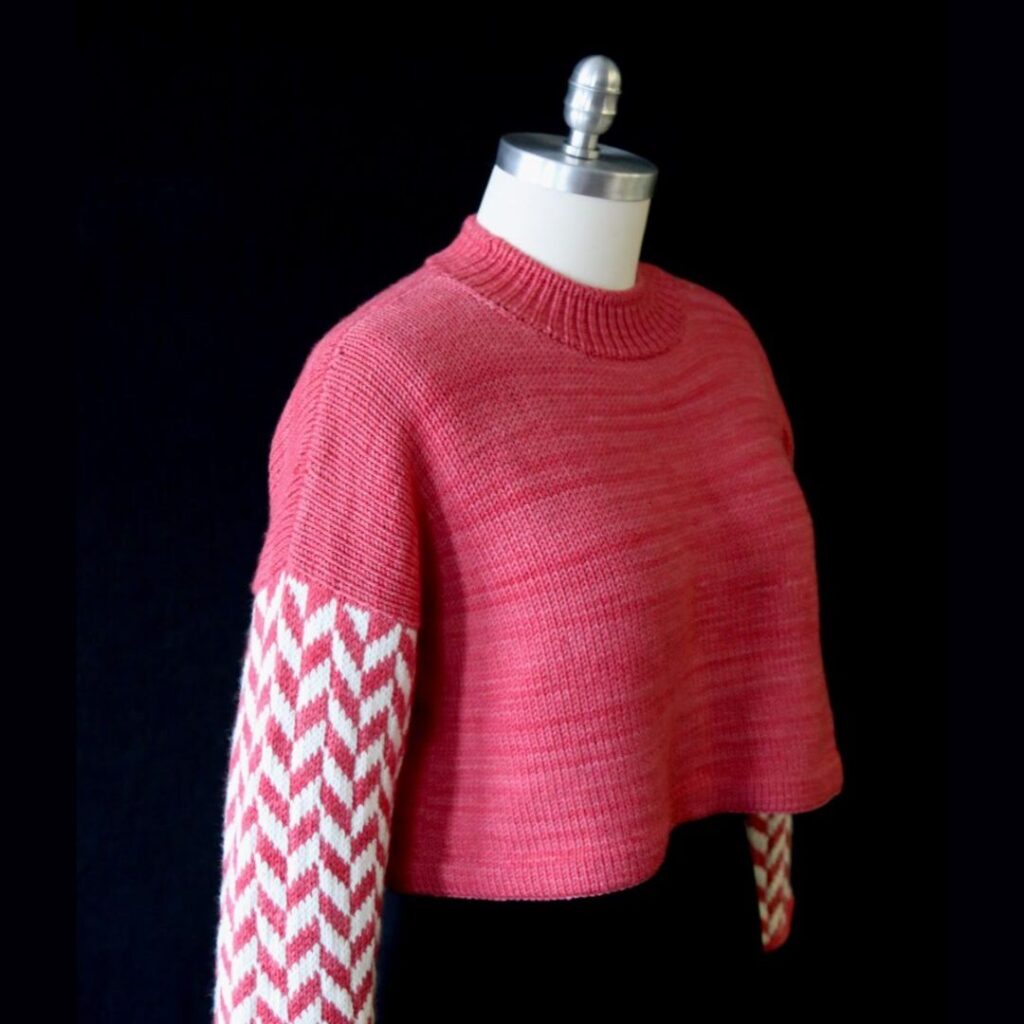
A drop shoulder sweater in its simplest form is simply two rectangles for the front and back, sewn together, and then some sleeves (or no sleeves – and you have a vest!).
Instead of the sleeve seam sitting at the shoulder, it “drops off” the shoulder (see sweater pictured here – the seam connecting the body and the sleeve sits on the bicep) — usually landing around the upper arm or even down to the elbow. This relaxed style offers a roomy, comfortable fit and endless design possibilities.
Common Characteristics
- Seam lands below the shoulder (anywhere from just off the shoulder to the elbow)
- Generally no sleeve cap shaping (but you might encounter a pattern that has a seam closer to the shoulder that has a ‘mini-cap’
- Can be constructed bottom-up or top-down, flat in pieces or (the body at least) in the round
- Works well with drapey fabrics for a flattering fit
Construction Options
You’ve got choices — lots of them. Drop shoulder sweaters can be:
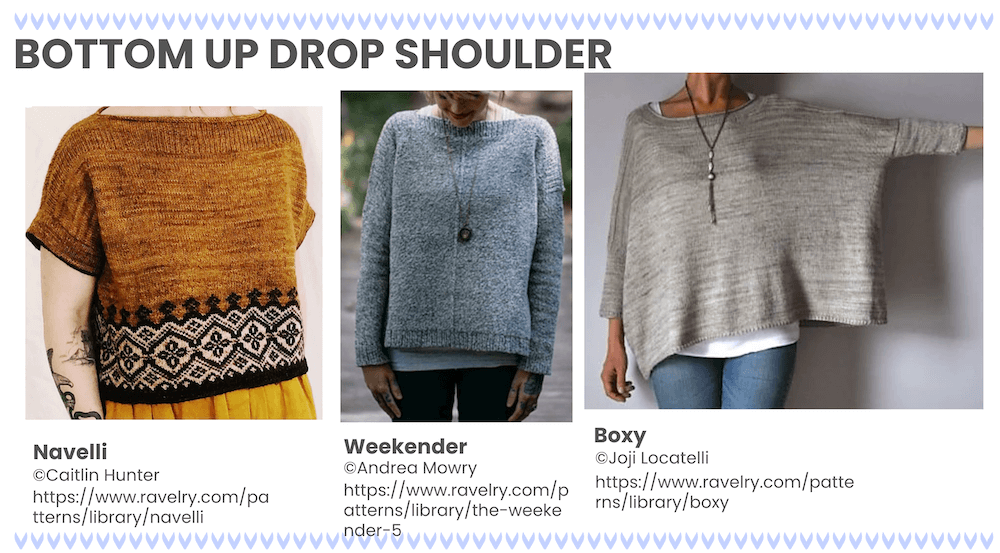
- Knit bottom up in pieces and seamed
- Knit bottom up in the round to the underarm, then finish the front and back to the shoulders flat
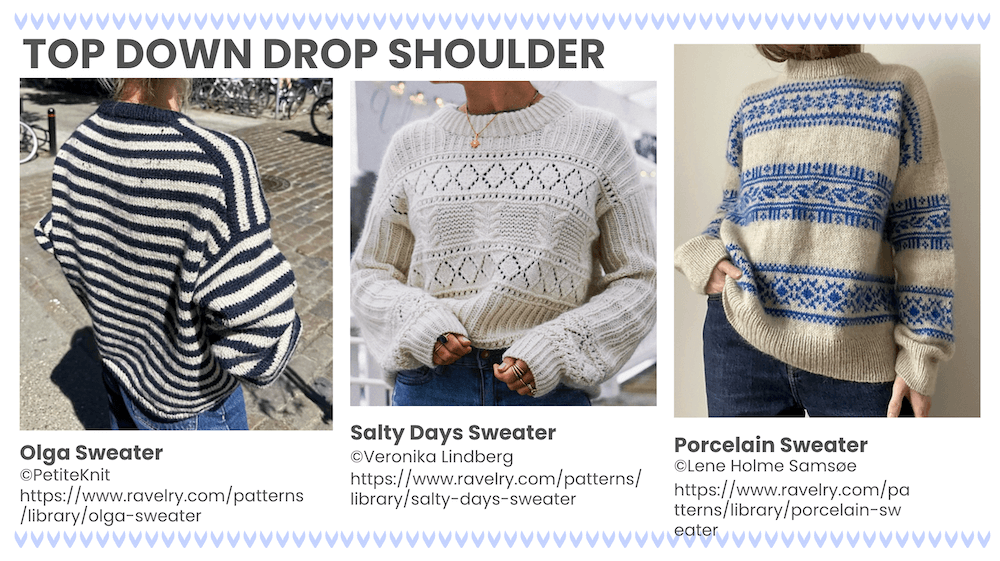
- Knit top down, starting from the neckline and knitting flat to the underarm (and then the body can be knit flat or in the round)
There’s no right or wrong here — it depends on your style preference and comfort level with different techniques. Just know that regardless of the method, this construction is very accessible.
Why Drop Shoulder Sweaters Are Great (and When They’re Not)
Pros
- Easy construction – perfect for beginners
- Portable if knit in pieces
- Built-in structure when seamed, which helps with fit and longevity
- Versatile – works with many yarns, including plant fibers and superwash (when it’s knit in pieces and seamed)
Cons
- Less try-on-as-you-go friendly than top-down raglans or yokes
- Full sweater in your lap if knitting sleeves onto a seamed body
- Can look boxy if worked in stiff fabric with no drape
Key Measurements for a Perfect Fit
Here’s where knitters often get tripped up. All the standard body measurements are necessary but there are two that are very important for a perfect fit.
For drop shoulders, the two measurements that matter most are:
- Upper torso or full bust circumference (depending on body shape)
- Bicep circumference at the point where the sleeve joins the body
If your full bust is 2 inches larger than your upper torso, the standard knitting pattern was written with you in mind. If the difference is larger than two inches, using your upper torso to choose a size is a better option for a good fit.
Once you’ve chosen a size based on that full bust or upper torso, check the sleeve circumference to make sure it will fit your bicep (with a few inches of positive ease).
How to Measure for a Great Fit
To figure out where that seam will land:
- Take the finished bust circumference of the sweater.
- Divide by 4 (for one quarter of the sweater width).
- Measure from your neck out that many inches on your arm.
- Measure your arm circumference at that point — that’s your target bicep fit.
You can also reverse the process: Decide where you want the sleeve to land (elbow, mid-arm, etc.), then measure there and calculate the sweater width needed to hit that point.
Let’s Talk Ease
Ease = the space between your body and the garment. For drop shoulder sweaters:
- Minimum ease at the upper torso should be 4–8 inches
- You can go oversized for a relaxed look (think 10+ inches)
- Less ease = higher sleeve seam, more ease = lower seam
Watch out for sleeve fit too! Make sure your sleeve circumference is your bicep measurement plus 1–2 inches minimum.
Modifications for Better Fit
If you have a full bust, here are two great modifications:
1. Knit Different Sizes for Front and Back
- Knit your chosen size for the back using your upper torso measurement to choose the ‘base size’
- Size up for the front only – look at the pattern and see which size would better fit your full bust (use the stitch counts when knitting the front, but refer to the back piece for all the lengths)
- Use neckline or armhole decreases to get the same stitch count as the back – you need the same stitch count for the shoulders to seam or bind off properly.
2. Add Bust Darts
- Use increases between the waist and bust
- Decrease back out after bust (getting rid of the stitches the same as explained above)
The primary goal? Make sure your shoulders match in stitch count for seaming.
Fabric and Yarn Tips
Avoid stiff, boxy fabrics unless that’s the look you’re going for. Instead, go for:
- Drape-friendly fibers like silk, superwash wool, bamboo, or linen blends
- Softer gauges (not too tight)
- Seam-supportive construction to maintain shape
Fit Issues to Watch For
- Seam sitting on shoulder? Not enough ease – choose a larger size
- Too tight sleeves? Remeasure bicep at seam point to make sure it will fit your upper arm
- Drapey fabric sagging at sides? It’s normal with oversized fits
- Boxy fit on full bust? Use drapey fabric or add bust shaping
Bottom Line
Drop shoulder sweaters may look simple, but the key to a flattering, wearable result lies in knowing your measurements, understanding ease, and choosing the right yarn and construction method.
Once you get the hang of it, this style is endlessly customizable — from sleek and fitted to ultra-oversized and cozy.
Watch the video for more details
