
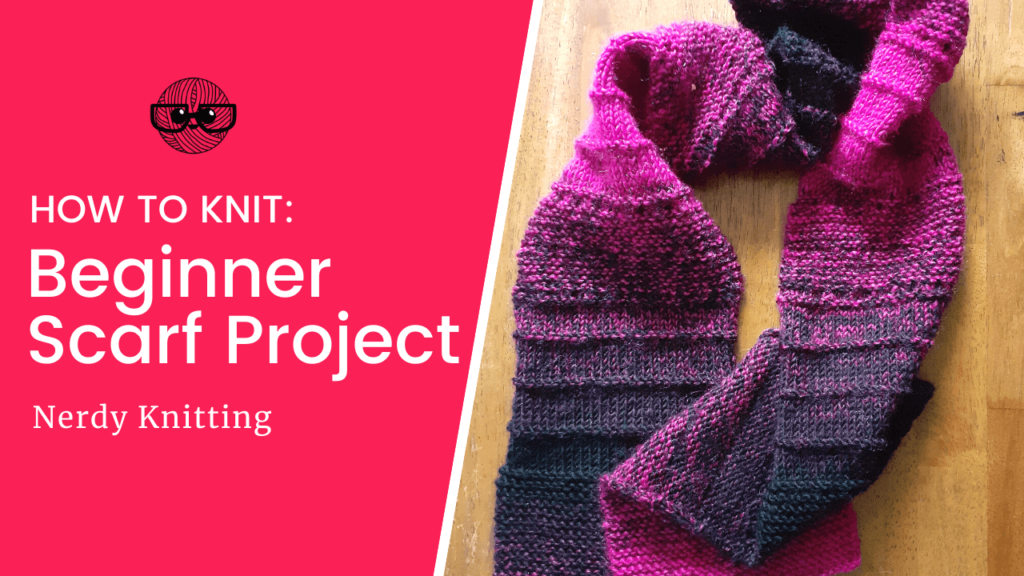
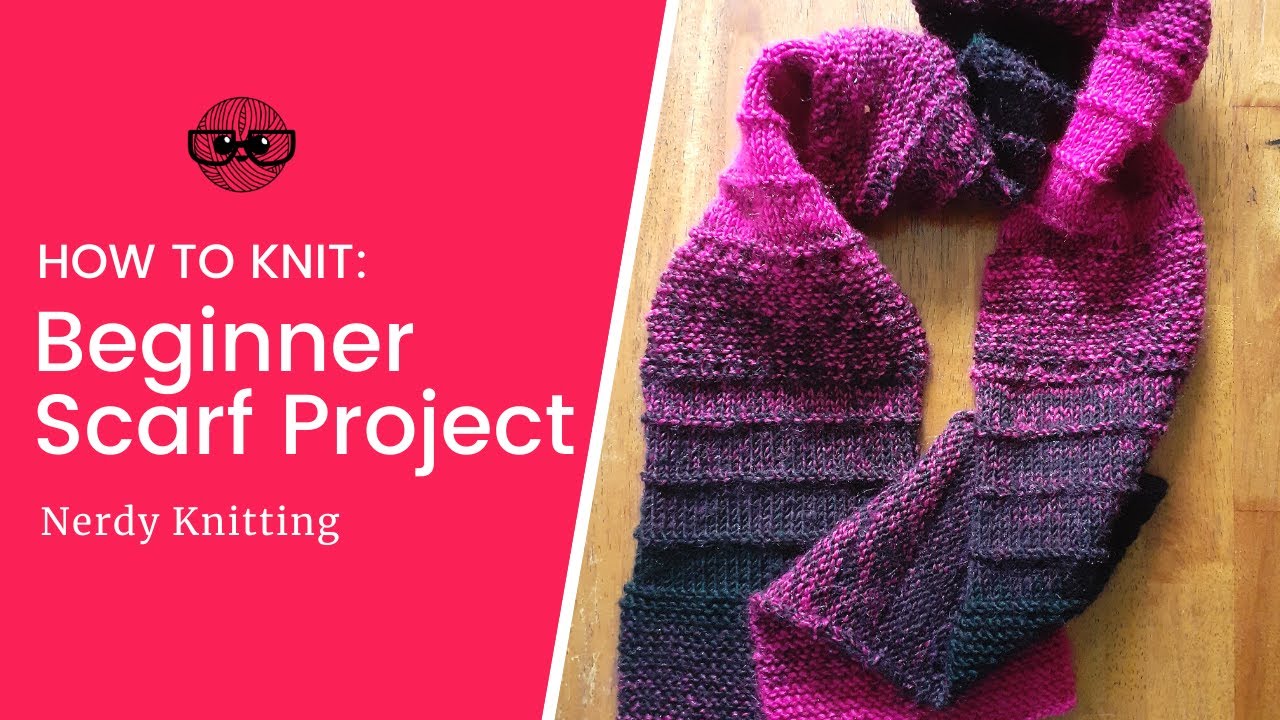
If you’ve ever wanted to learn how to knit, a scarf is a simple, quick project that can teach you all the basics of knitting. This easy scarf knitting pattern for beginners includes the pattern as well as a full video tutorial that will have you knitting in no time!
There are a few basics that every knitter needs to learn, including how to cast on stitches, how to knit, how to purl, and how to bind off. You’ll know exactly how to to all of these plus a few more tricks and tips to help you become a successful, confident knitter.
But it’s more than just a pattern – there’s a full video tutorial that will walk you through all the steps and show you exactly how to do everything you need to complete this scarf.
Get the Beginner Scarf Pattern
You’ll find all the necessary details for completing this beginner scarf in the information box below – the yarn to buy, the needles to use, and all the other details. Click the ‘Buy Now’ button and you’ll be able to download your copy of the pattern right after purchasing. And, once you have your pattern, scroll down and you’ll find the video tutorial that will walk you step-by-step through your scarf pattern (the link for the video is also directly embedded in the pattern).
Knitting Supplies
You’ll also need yarn and needles for completing the scarf. I used Lion Brand Scarfie yarn (available at LoveCrafts) to knit the sample in the pattern. The knitting needles used are US 9 (5.5mm) – straight needles (like these Knitter’s Pride Ginger needles) or a circular needle (like this one) will work just fine. If you’re a new knitter I suggest you start with a wood or bamboo needles because they’ll hold your stitches well (it’s easy to drop stitches with slick metal needles).
Watch the Video Tutorial
Once you have your pattern and supplies, watch the video below for each step in the beginner scarf knitting process. If you watch directly on YouTube, you’ll find timestamp links so you can skip to the step you’re currently working on (just click on the video then click on ‘YouTube’ in the bottom corner to head to YouTube for that information). If you prefer a written tutorial, you’ll find one below the video.
Beginner Scarf Pattern Tutorial
If you prefer a written tutorial, I’ve got you covered. All the basic steps are included here (for more detailed information you’ll need to refer to your pattern after you’ve purchased and downloaded it). To jump to any point on this page, use the Table of Contents links just below this list.
Here’s what we’ll cover:
- Casting on with the knit cast on
- Working the knit stitch
- Counting rows in Garter stitch
- Introducing the purl stitch
- Working & counting stitches and rows in Stockinette stitch
- Using increases and decreases to create the eyelet row
- Binding off purlwise
Casting on with the Knit Cast On
The first step is making a slipknot (leaving a short tail to weave in later on) and placing it on one of the knitting needles.
To make a slipknot:
- Wrap the yarn around your first two fingers, pinching the ends together between your index finger and thumb. See image 1 below.
- Wrap the yarn a second time, to the left of the first wrap. See image 2 below.
- Bring the tip of the knitting needle between the two loops and draw the second loop through the first, pulling it through to make the slipknot. See images 3 & 4 below.


Casting on the Stitches
To work the Knit Cast On, hold the needle with the slipknot in your left hand and the empty needle in your right hand.
- Insert the right needle underneath the left into the slipknot. See image 1 below.
- Bring the yarn from underneath, counter-clockwise around the needle. See image 2 below.
- Pull the yarn through to create a new cast-on stitch. See image 3 below.
- Hold the needles parallel and slip the new stitch to the left needle. See image 4 below.
Repeat this process, inserting the right needle into the new stitch, wrapping the yarn, pulling it through, and placing the new cast-on stitch onto the left needle. Continue until you’ve cast on the required number of stitches.


How to work the Knit Stitch
Once you’ve cast on the number of stitches needed from the pattern instructions, it’s time to start knitting. If you cast on using the Knit Cast-on, you’ll discover that the knit stitch isn’t that much different.
Start with the needle with the cast-on stitches in your left hand and the empty needle in your right (it doesn’t matter if you’re right or left-handed, you need both hands to knit). The yarn should be hanging down from your last cast-on stitch.
- Just like the Knit Cast-on, insert the right needle into the first stitch on the left needle (from left to right). See image 1 below.
- Bring the yarn up and around, counter-clockwise. See image 2 below.
- Pull the new stitch through with the right needle. See image 3 below.
- Instead of placing that stitch on the left needle, keep it on the right needle and let the stitch you just worked into drop off the left needle. See image 4 below.
Repeat this process for every stitch on the left needle – inserting the right needle, wrapping the yarn, pulling the new stitch through, and letting the just worked stitch drop off the left needle.


When you finish knitting all the stitches off the left needle, you need to reposition yourself – with the empty needle in your right hand, the needle with the stitches in your left hand, with the yarn hanging down and to the back, ready to work the next row. Repeat the process of knitting the stitches across the row.
Counting Rows in Garter Stitch
As you knit every row, the fabric produced is called Garter stitch. It’s a very stretchy material with rows and rows of ridges across the fabric. The easiest way to keep track of how much you’ve knit is to count each of those ridges – each one counts as TWO completed knit rows.

As you follow the pattern (there are instructions on how many Garter ridges you should have), count the ridges in your scarf and move on to the next section when you’ve completed that step.
Introducing the Purl Stitch
After the first section of Garter stitch (and practicing the knit stitch), it’s time to introduce the other necessary stitch when it comes to knitting – the purl stitch (sometimes called the opposite of the knit stitch).
To work the purl stitch, you start the same way – with the work in your left hand and the empty needle in your right and the yarn hanging down. This time, the yarn should be held towards the front instead of the back.
- Insert the right needle from right to left into the first stitch on the left needle. See image 1 below.
- Bring the yarn towards you, up and over the needle. See image 2 below.
- Pull the new stitch through, dropping the old stitch off the left needle. See images 3 & 4 below.
Repeat this process, inserting the needle (from right to left), wrapping the yarn, pulling the stitch through, and dropping the old stitch off the left needle, until you’ve completed the whole row. Then, like the knit row, turn the work and reposition the needles to work the next row.


Understanding Stockinette Stitch
This Stockinette with Purl Ridge section of the pattern (see your copy of the pattern for complete information), alternates knit rows with purl rows to produce Stockinette stitch – a flat fabric with columns and rows of little ‘V’s. Each of those little ‘V’s is one stitch. To count the number of rows you’ve completed, use the tip of your knitting needle and tap the center of each V and count one column of stitches.

Learning how to count stitches is such an important step in knitting. Many new knitters skip this step and have to rely on others to tell them how many rows they’ve completed. It isn’t hard to figure out but it’s an absolutely essential skill for every knitter. Learn to count your stitches!
The sections of Stockinette stitch in the Beginner Scarf pattern include small purl ridges to create a little bit of texture. These are created by purling on the right side of the work instead of knitting, which puts the heads of each stitch on the front of the work and creates those little ridges.
Eyelets with Increases & Decreases
After completing the Stockinette section, a few new things are introduced – increases and decreases – which are used to create decorative elements or shaping for a knitting project. This Beginner Scarf pattern introduces two basic increases and decreases – the yarn over (an increase) and a knit 2 together (a decrease – abbreviated as ‘K2tog’) which are used to create rows of decorative eyelets in the scarf.
Yarn Over Increases
An increase in knitting refers to adding a stitch to the total stitch count for a particular row. The Yarn Over method for working the increase produces a small, decorative hole.
To work a yarn over: bring the yarn from the back, under the right needle, bringing it up and over the needle and to the back again (see image 1 below). That’s a yarn over. It’s important to hold that yarn over on the right needle while knitting the next stitch so it doesn’t slip off your needle. Bringing the yarn up and around the needle in this manner creates a decorative hole in the fabric (called an eyelet) – see image 2 below.


K2tog Decreases
A decrease in knitting, removes a stitch from the total stitch count on a particular row. The K2tog (‘knit two together’) decrease is worked just like it sounds – by knitting two stitches together as one stitch.
To work a k2tog: insert the right needle into the first TWO stitches as if to knit and work them together as one stitch. This is worked just like a regular knit stitch, but instead of inserting the right needle into just one stitch, insert the needle into the second stitch and also into the first, working them together as one stitch. See the images below: image 1 – inserting into both stitches; image 2 – wrapping the yarn to work the knit stitch; image 3 – pulling the new stitch through; image 4 – the center stitch in the image is the final K2tog.


Alternating these yarn overs and k2togs across the row creates a series of decorative eyelets. The yarn overs create the decorative holes (and each yarn over also increases the stitch count for that row) and the k2togs decrease the stitch count so your final stitch count remains the same when you finish working the row.
Binding off Purlwise
Once you’ve completed the Garter & Eyelet section of the scarf, you’ll alternate that section with the Stockinette & Purl Ridge section for the length of the scarf. Refer to your pattern for the complete details on how many times to repeat these sections.
After you’ve worked all those section repeats, you’ll work another section of Garter, but this time you’ll purl every row (which actually produces Garter stitch – just like knitting every row does!) before binding off.
If you didn’t bind off, and just pulled out your knitting needle, all your hard work would unravel. So we bind off the stitches to hold everything in place. To bind off purlwise, purl the first two stitches. Then insert your left needle, from left to right, into the first stitch on the right needle (the stitch furthest from the needle tip), and bring it up and over the second stitch on the right needle. That is one stitch bound off (see images below).
Purl another stitch and repeat the process – inserting the left needle into the first stitch on the right needle and bringing it up and over the second stitch. Repeat these steps until you’ve bound off all the stitches.


The final thing to do is to weave in the ends. Use a small tapestry needle, thread the yarn tail onto the needle, and weave it through on the wrong side of the scarf. After that, follow the instructions for washing your scarf (see the yarn label for details on how to do that) and you have a new, beautiful scarf AND you’ve successfully learned all the basics of knitting. Now you’re ready for your next project!
More Projects for New Knitters
- How to Knit a Cup Cozy (FREE pattern and video tutorial)
- Easy Dishcloth Patterns for Beginners (three FREE patterns and video tutorials)
- 10 Projects for Brand New Knitters