
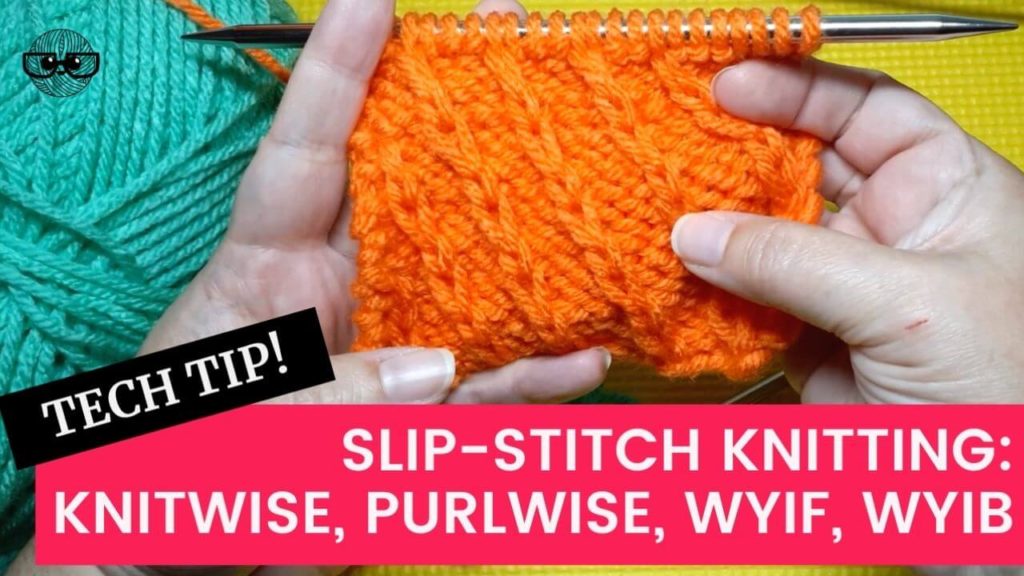
There’s no reason for knitters to be intimidated by slip-stitch knitting. Once you know the basics (and there are only a few rules you need to know) you’ll be working slip-stitch patterns confidently in no time at all.
At its most basic, slip-stitch knitting involves a simple technique that involves slipping stitches to create a variety of designs. The basic form of slip-stitch knitting uses just one color (although more than one color can be used). No matter the number of yarns or particular designs, there are two rules that are involved in the process.
The two basic rules of slip-stitch knitting:
- Stitches are always slipped purlwise.
- Yarn can be held to the front or to the back – depending on the particular slip-stitch pattern.
Now you know the only rules you need to understand to start knitting slip-stitch patterns. Let’s take a closer look at these two rules and how they are applied to knitting. We’ll also look at reading some slip-stitch charts, swatches, and some fun patterns that feature these interesting stitches.
Some links below are affiliate links. If you click through and make a purchase, I may receive a small commission at no extra cost to you. See the disclosure policy.
Rule 1: Slip stitches purlwise
Slipping a stitch purlwise involves two simple steps. First, you need to insert the right needle into the first stitch on the left needle like you’re going to purl the stitch (hence the term ‘purlwise‘ – also commonly referred to as ‘as if to purl‘ in many knitting patterns). Next, instead of purling the stitch, you perform the next action – moving the stitch from the left needle to the right without working it (the act of slipping the stitch). See the images below.

Inserting right needle purlwise. 
Stitch slipped purlwise.
What about slipping stitches knitwise?
Slipping stitches knitwise (or ‘as if to knit’) is worked in a similar manner but, instead of inserting the right needle as if to purl, you insert the right needle into the first stitch on the left needle as if to knit (or ‘knitwise’) and slip the stitch. Slipping knitwise also changes the stitch mount.
This technique is generally reserved for working decreases (like SSK or SKP) or other specialty stitches.
But, if a pattern uses the common term ‘slip the stitch‘ you can assume that it means purlwise (with the yarn held to the wrong side of the work) unless the pattern states otherwise or you’re working a decrease.
Rule 2: Hold yarn to the front OR to the back
Now that you understand how the stitch is slipped, the next step is understanding where the working yarn is located before that stitch is slipped.
Yarn Held to the Wrong Side of the Work
The working yarn can be held to the wrong side of the work while the stitch is slipped, which creates a short float across the back of the work. This method creates stitches that have an elongated appearance on the right side of the fabric. This method can also be used to create creases and pleats in knit fabric.

Slipping a stitch with the yarn in back. 
Elongated knit stitches.
Yarn Held to the Right Side of the Work
Alternatively, the working yarn can be brought to the front of the work (moving the yarn back-and-forth BETWEEN the needles) before the stitch is slipped. This puts the float across the front of the work and is used as a decorative element that can create a woven appearance.
See this technique in this Linen Stitch Dishcloth pattern (the yarn held to the right side of the work creates a woven texture on the front and a Seed stitch texture on the back)
Always be sure to move the working yarn back-and-forth between the needles and not over the top of the needles, which may cause an accidental yarn over.

Slipping stitches with yarn in front. 
Floats used as decorative detail on right side.
These floats can also be carried across while multiple stitches are slipped (generally with the yarn held to the right side of the work). These long floats can be gathered to create other unique and decorative patterns like the Butterfly Stitch shown below.

WYIB & WYIF
The stitch pattern will explain where the yarn is held using the terms ‘wyib’ (with yarn in back) or ‘wyif’ (with yarn in front). These instructions explain where the yarn is held in relation to you and the work. It does NOT refer to the right side or wrong side of the work.
The front refers to whichever side is currently facing you – even if that is the wrong side of the work. Even when you’re working a wrong side row the instructions will say ‘wyif’ if you are to bring the yarn to the side that is currently facing you.
Once you have moved the yarn to the appropriate position, insert the right needle into the first stitch on the left needle and slip the stitch purlwise. After slipping the stitch (or stitches, if more than one is slipped), move the yarn into position to work the next stitch.
One tip: be sure to spread the stitches out on the right needle after slipping a stitch – to give the float a little room. If you slip the stitch and keep all your stitches crowded together, the float will be short and will cause the fabric to pucker. This does NOT apply if you’re working a pleat or crease when pulling the float tight will help create the necessary fold for the fabric.
Depending on the pattern, the abbreviations ‘wyif’ and ‘wyib’ may be replaced with ‘yf’ (yarn forward) and ‘yb’ (yarn back) or ‘wyf’ (with yarn forward) or ‘wyb’ (with yarn back).
These three instructions will actually produce the same result:
- K1, sl1 wyif, k1.
- K1, yf, sl1, yb, k1.
- K1, sl1 wyf, k1.
Second tip: always check the knitting pattern. A designer might use the terms differently and they may relate to the right side or wrong side of the work. Look at the finished garment and instructions before making an assumption that the designer is following the standards used as it refers to ‘yarn in back’ or ‘yarn in front’.
The best thing you can do with any slip-stitch pattern is to read the chart or instructions and look at the finished garment to see if the floats are decorative and placed on the right side of the work or if they are on the wrong side of the work and used to create elongated stitches (or pleats or creases). Once you’ve determined this you’ll always know exactly where they yarn should be held in relation to the project you’re working.
Slip-stitch Knitting Instructions
Now that you understand the basic rules of slip-stitch knitting, let’s take a look at how these rules translate to charts and written instructions for slip-stitch patterns.
Charts
When reading a chart, the first thing to remember is that the chart represents what the right side of the work should look like. As a simple example, think of the basic knit and purl stitches used in a K2P2 rib.
If you’re a knitter with basic experience, you realize that after working the first row (written instructions would read: *K2, p2; rep from to last 2 sts, k2.), that on the next row, those symbols reverse, and the blank boxes represent purl stitches and the black dots represent knit stitches (and written instructions would read: *P2, k2; rep from * to last 2 sts, p2.).
These two rows produce a K2P2 rib and the chart represents what that will look like in our knitted work when it’s viewed from the right side of the knitting.

This rule also extends to other knitting symbols – including slip-stitch patterns. There are a few basic symbols you need to be aware of that relate to slip-stitch knitting:
- V or a V with a line underneath – if the yarn is held to the wrong side of the work (no floats should be seen on the right side of the work).
- V with a dot or a line through it – if the yarn is held to the right side of the work (with floats used as decorative elements on the right side of the work).

The stitch chart below demonstrates one of these symbols in action. The chart shows us that this pattern produces elongated stitches on the right side of the work so we know that the floats will always be carried on the wrong side of the work.
So, if we’re working a right-side row, we hold the yarn to the back and when we’re working a wrong-side row, the yarn is held to the front (remember, front and back refers to the side of the work that is facing you, NOT the right and wrong side rows).

If a yarn should be held to the right side of the work – when the float is used as a decorative element – the ‘V’ will have a dot (or a line through the ‘V’) that represents that. The stitch chart below shows an example of this. If this pattern happened to have slipped stitches on the wrong-side rows, they would be slipped with yarn held to the back when working those rows (so the floats would carry across the right side of the work).

Written Instructions
As far as written instructions for slip-stitch patterns, the abbreviations you need to know include:
- pwise (purlwise)
- sl (slip)
- sl1p (slip one purlwise) – not often used since it’s understood that slip-stitch patterns like these are always slipped purlwise
- wyib (with yarn in back), yb (yarn back), wyb (with yarn back)
- wyif (with yarn in front), yf (yarn forward), wyf (with yarn forward)
As you can see, all the instructions relate to how the stitch is slipped and where the yarn is held in relation to the work. Let’s look at these in action.
The following written instruction is for the Slipped Diagonal Rib chart above: Row 2 (RS): K1, *sl1 wyib, p3; rep from * to last st, k1.
It’s telling us that we are slipping one stitch with the yarn held to the back of the work.
The following written instruction is for the Woven Herringbone chart above: Row 2 (RS): *Sl3 wyif, k3; rep from * to end of row.
It tells use that we are slipping three stitches with the yarn held to the front of the work.
More Advice for Slip-stitch Knitting
The information above will certainly provide a good foundation for your forays into knitting slip-stitch patterns but there’s a bit more that you may want to explore. Here’s a little more information about yarn choice and some patterns that include slip-stitch designs.
Slip-stitch Colorwork
To this point, we’ve only looked at slip-stitch patterns that use one color but you’ll find plenty of patterns that use more than one color (even three or four may be used – but thankfully, not all on the same row!). One color is used in each row and patterns vary in the number of rows worked in each color. Focusing on one color per row makes it a nice introduction to colorwork knitting.
The rules are still the same – stitches are always slipped purlwise and the yarn can be held to the front or to the back of the work to elongate the stitches or create decorative elements.
One popular sub-set of slip-stitch colorwork is Mosaic knitting (a term coined by Barbara Walker). In Mosaic stitch patterns two colors are used in alternating rows to create a geometric pattern. While one color is worked (for two rows), stitches worked in the second color are slipped with the yarn held to the wrong side of the work.
Mosaic patterns can be worked in Garter, Stockinette, or a combination of the two. And, while yarn can be held to the right or wrong side of the work in slip-stitch colorwork, it’s always held to the wrong side of the work in Mosaic patterns.
Best Yarn for Slip-stitch Knitting
While you can certainly use whatever yarn you like when knitting a slip-stitch design, there are a few things to keep in mind to enhance the pattern.
- For slip-stitch designs that are worked in one color, choose a solid color and a smooth or plied yarn that will show off the intricate stitches. Textured or novelty yarns (or highly variegated yarns) will obscure the design.
- For slip-stitch colorwork, contrasting colors will make the design pop. A variegated yarn paired with a solid color might also be a good choice (and those variegated yarns that you’re not sure how to use can actually be enhanced by using a slip-stitch pattern).
No matter what yarn you choose, be sure to work a swatch to make sure the design is showcased in a manner that you find suitable.
Slip-stitch Fabric
Slipping stitches in knit fabric change the basic structure of the fabric. When more than a few stitches are slipped, the resulting fabric is tighter and less stretchy. The elongated stitches condense the row gauge and, depending on how tight or loose the floats are, the horizontal fabric can also be tighter.
While a tight, dense fabric is certainly preferable for things like trivet pads or pot holders, it’s not usually what is desired in a sweater. For this reason, swatching becomes even more important so you understand how the finished fabric will behave.
4 Knitting Patterns that Feature Slip-stitch Designs
Now let’s put all this into practice with a quick look at a few knitting patterns that feature slip-stitch designs.
Ballband Dishcloth
This classic pattern is a two-color design and perfect for those who want to try a simple slip-stitch colorwork pattern in a small project.
Get the pattern: Ballband Dishcloth

Bumble Hat
The adorable Bumble hat from Tin Can Knits features a tweedy, textured, slip-stitch pattern for the body of the hat.
Get the pattern: Bumble Hat
Weekender
Andrea Mowry’s Weekender is a popular sweater pattern that features a single slipped stitch at the center of the front and back of the sweater.
Get the pattern: Weekender

Copenhagen Calling
This beautiful cowl from Isabell Kraemer features a slip-stitch colorwork section along with some lace and ribbing sections.
Get the pattern: Copenhagen Calling
More Knitting Techniques & Tips
- 5 Basic Knitting Cast On Techniques every Knitter Should Know
- How to Decrease in Knitting (6 Basic Techniques for Every Knitter)
- How to Increase in Knitting (Essential Increases for Every Knitter)
Sources
- Craft Yarn Council
- The Essential Guide to Color Knitting Techniques by Margaret Radcliffe (available on Amazon)
- Mosaic Knitting by Barbara Walker (available on Amazon)
- Vogue Knitting (available on Amazon)
- “Slipped Stitches” by Mary Forte, Cast On (The Knitting Guild Association)
- “Slip Stitch Knitting Redux” by Leslie Gonzalez, Cast On (The Knitting Guild Association)