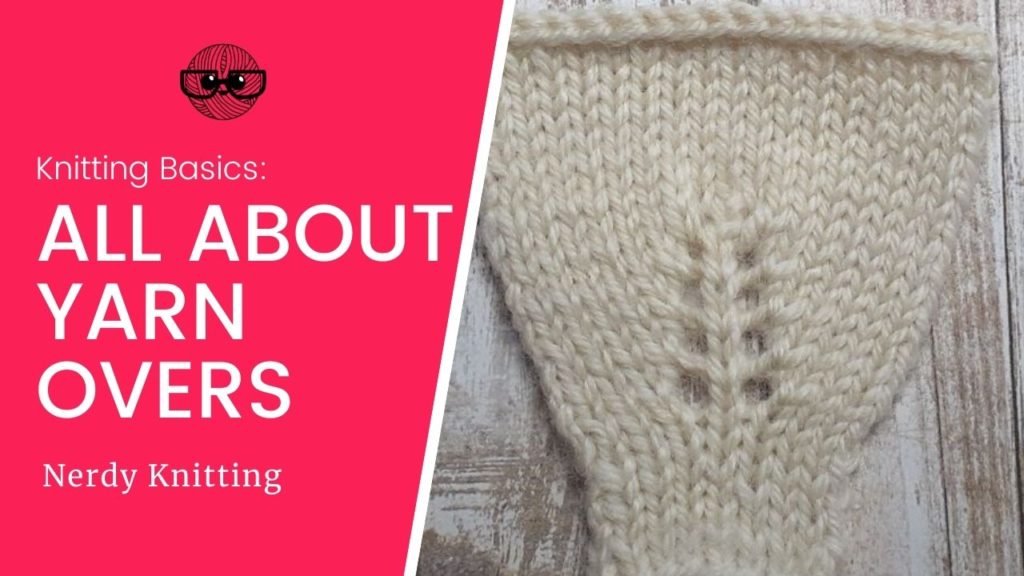
Yarn overs are a basic increase stitch that every knitter should know how to work. It creates a decorative hole (an eyelet) in the knitted fabric and is often used in lace designs with paired decreases to create many different lace designs. It’s also used to shape garments and accessories. For example, yarn overs could be used to create the Raglan shaping in a top-down sweater or to create the shape for a top-down triangle shawl. In both cases, the yarn overs increase the stitch count but also provide decorative eyelet patterns in the garment.
To work a yarn over, bring the yarn between the two knitting needle and up and over the right needle. That is the yarn over. To keep it in place you’ll need to work the next stitch. Hold the yarn to the back to knit the next stitch or bring it between the needles to purl the next stitch.
While that is the basic method for working a yarn over, there is more to know – how yarn overs work between different variations of knit and purl stitches, how to easily pick up a missed yarn over, how to work the yarn over on the next row to close the hole, along with a few other helpful tips.
How to Make a Yarn Over
Like I described above, a yarn over is simply wrapping the yarn around the right needle to create a new stitch. It’s abbreviated ‘yo’ in knitting patterns in North America (but can also be abbreviated in other ways, see below for more details). But the distance the yarn must travel changes based on the stitch that comes before the yarn over and the stitch that comes after the yarn over. Here are the four different variations for making yarn overs between knit and purl stitches.
Yarn Over Between Knit Stitches
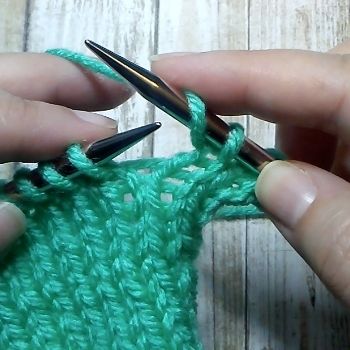
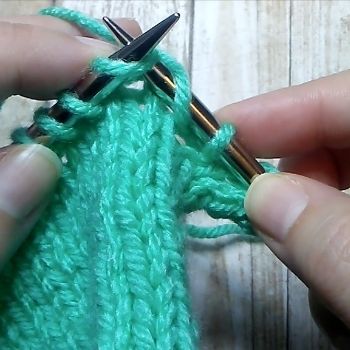
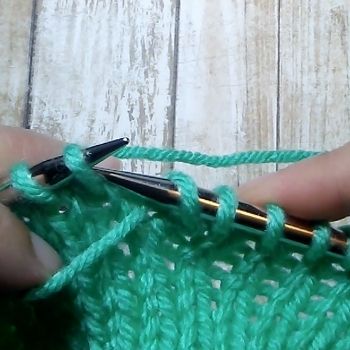
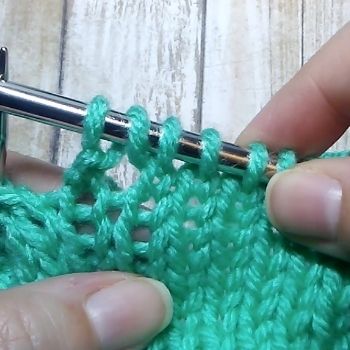
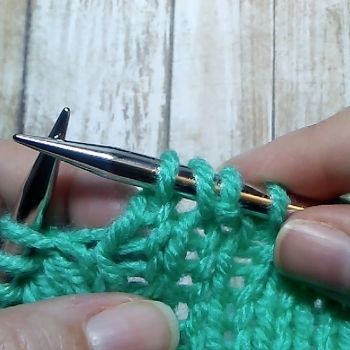
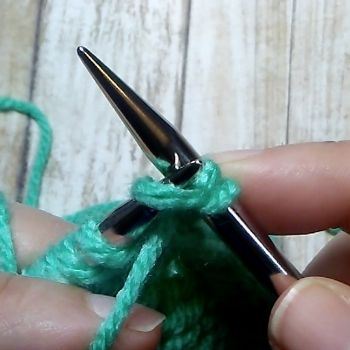
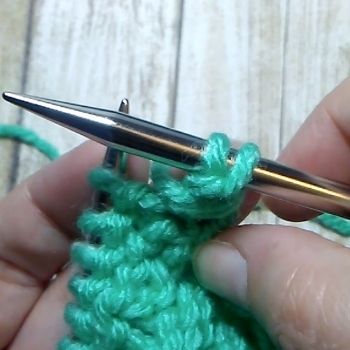
To work a yarn over between two knit stitches, the yarn is to the back after creating the knit stitch that comes before the yarn over. Bring this yarn between the needles to the front of the work (the side that’s facing you). Now carry this yarn up and over the right needle and to the back again (see image 1 below). The yarn over is complete but to hold it in place the next stitch on the left needle must be worked (see image 2 below). With the yarn still in the back, knit the next stitch.
Along with ‘yo’, this particular yarn over may be abbreviated ‘yf’ or ‘yfwd’ (both mean yarn forward) or ‘yfon’ (yarn forward and over needle).
Yarn Over after a Knit Stitch & before a Purl Stitch
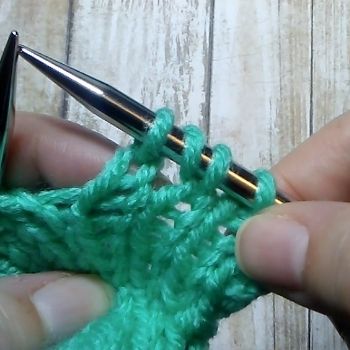
While a yarn over is probably most often worked between knit stitches, that’s not always the case. Sometimes a purl stitch comes after the yarn over. After knitting the stitch before the yarn over, bring the yarn to the front of the work between the two needles. Carry the yarn up and over the right needle. But to purl the next stitch, the yarn needs to come to the front between the two needles again (see image 1 below). With the yarn in this position you are ready to purl the next stitch.
Along with ‘yo’, this particular yarn over may be abbreviated ‘yfon’ (yarn forward and over needle) or ‘yfwd yarn’ (yarn forward, then yarn round needle).
You’ll notice, as you’re working this type of yarn over, that the yarn must travel further than a yarn over between two knit stitches. Of all four methods, with this method the yarn travels around and between the needles the furthest and commonly creates a slightly larger hole than a standard yarn over between two knit stitches.
Yarn Over between Purl Stitches
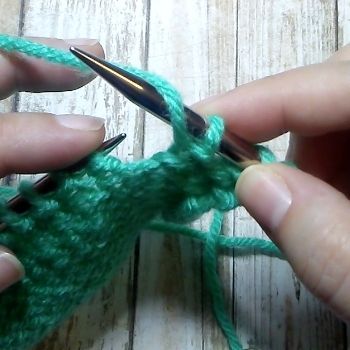
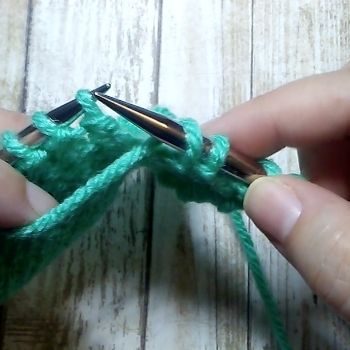
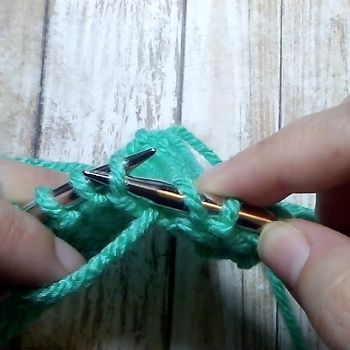
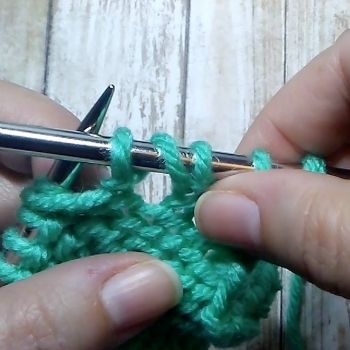
A yarn over worked between two purl stitches is similar to the yarn over between two knit stitches. After purling the stitch before the yarn over should be placed, the yarn needs to be brought up and over the right needle to create the yarn over. Then the yarn needs to come to the front between the two needles so it’s in place to purl the next stitch (see images below).
Along with ‘yo’, this particular yarn over may be abbreviated ‘yb’ (yarn back) or ‘yrn’ (yarn round needle).
Yarn Over after a Purl Stitch & before a Knit Stitch
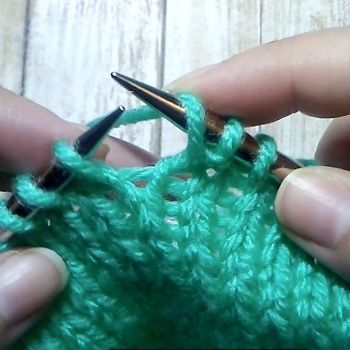
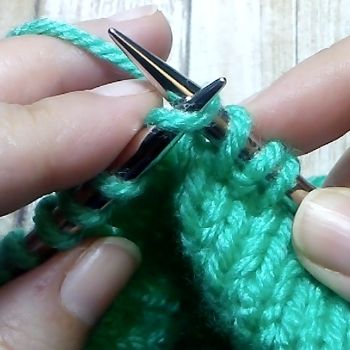
The final version of a yarn over is worked after a purl stitch with a knit stitch following. After purling, the yarn is in the front of the work. Bring the yarn up and over the right needle. The yarn over is created and the yarn is in place ready to work the knit stitch (see images below).
Along with ‘yo’, this particular yarn over may be abbreviated ‘yon’ (yarn over needle).
Of all the variations, this version can create the smallest hole because the yarn is traveling the shortest distance – from the front of the work, over the needle to the back of the work.
Discover the Confidence You Need to Fix Your Knitting Mistakes
By the end of this six-part self-paced course, you’ll be able to read your knitting, recognize a variety of knitting mistakes, and understand how to fix them.
Yarn Overs at the Beginning of a Row
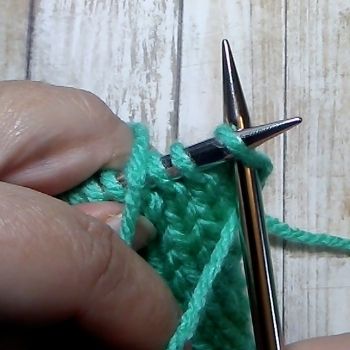
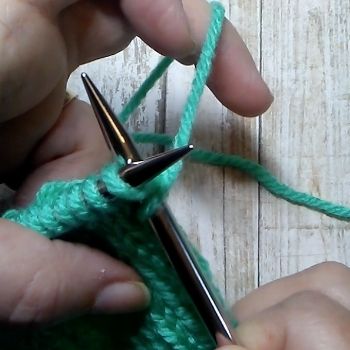
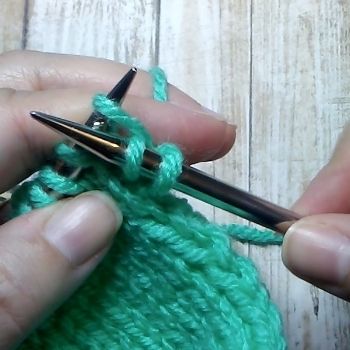
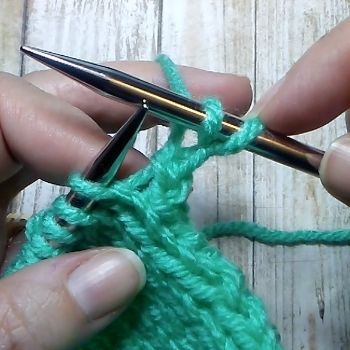
Yarn overs can also be added at the beginning of a row. If the first stitch is a knit stitch, hold the yarn to the front of the work as you insert to knit the first stitch. The yarn will be between the two needles (see image 1 below) Bring the yarn up and over the right needle and wrap to create the knit stitch (see images 2 & 3 below). You’ll notice that you now have two stitches on your right needle – even though you only knit one stitch (see final image below).
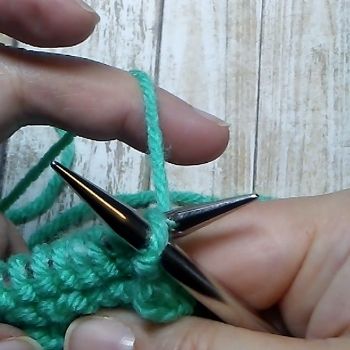
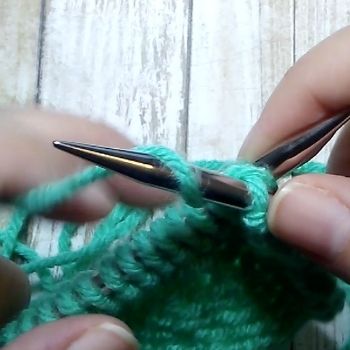
If the first stitch is a purl stitch, and you want to add a yarn over at the beginning of the row, hold the yarn to the back and insert the right needle as if to purl into the first stitch (see image 1 below). Bring the yarn up and over the needle before purling the stitch (images 2 & 3 below). As your new purl stitch is placed on the right needle, you’ll see an extra stitch just before – the yarn over that results from holding the yarn to the back and carrying it to the front of the work when purling.
No matter where a yarn over is worked, the basic method is the same – the yarn needles to be carried over the right needle to create a new stitch.
Working with Yarn Overs
Once you have a yarn over on your needles, you’ll need to work that yarn over on the next row or round of your knitting. Or, if you happen to forget to work a yarn over, it’s a simple process to pick up a missed yarn over.
Working the Yarn Over on the Next Row
Once you’ve created a yarn over, when you come to it on the next row or round of your knitting, it should be treated just like a normal stitch and either worked as a knit stitch or a purl stitch (depending on the pattern), knitting or purling into the front leg of the stitch.
Picking up a Missed Yarn Over
If you’ve ever knit a lace project you’ve probably missed creating a yarn over (we’ve all made that mistake – it’s very common!) where it should have been placed. But it’s very easy to pick up the strand of yarn running between two stitches and create a missed yarn over.
Work to the place the yarn over should have been placed. Look at the next stitch on the left needle and follow the yarn to the running bar that sits between the stitch on that needle and the stitch you just worked on the right needle. Using the left needle tip, pick up this running bar from front to back (just like picking up the yarn to create a Make One increase). That is your yarn over and now you can knit or purl into this new stitch (see image below). Since you are making a yarn over where you forgot to place one, the hole will be slightly smaller (but often this is still a better option than ripping back your work for one missed yarn over).
If you prefer video, here is a video that demonstrates how to work yarn overs and pick up missed yarn overs.
More Tips for Yarn Overs
Now that you know how to work a yarn over and all the variations for moving the yarn between knits and purls, here are a few more things that are good to know – how to adjust the size of the yarn over, close the hole created by the yarn over, and when you might want to use a yarn over.
When to use a Yarn Over
Yarn overs have many uses in knitting. They are most often used in lace designs and paired with decreases to create the lace designs. A simple yarn over paired with a decrease also makes a great simple buttonhole. They are also used to create elongated stitches (by wrapping the yarn multiple times around the needle), dropped stitches, they are used in Brioche knitting and to create short rows. Yarn overs are a useful technique that can be used for more than lace patterns.
Adjusting the Size of the Yarn Over
As you create the different yarn overs, you’ll notice that the yarn travels further for yarn overs where you knit before the yarn over and purl after the yarn over because the yarn is making a full rotation around the barrel of the needle to create the yarn over and come back to the front to create the following purl stitch.
On the other hand, when you purl a stitch then work a yarn over before a knit stitch, the yarn doesn’t have very far to travel – it just needs to go up and over the needle before working the knit stitch. If you had to work yarn overs using these two situations in the same project you’ll certainly notice the difference in size for the yarn over holes.
It is easy to adjust your yarn overs to make them as similar as possible – you just need to be aware of how far the yarn is traveling. For those situations where the yarn is traveling the furthest, work the yarn over on the very tips of the needles to make it smaller. You could also bring the yarn over the right needle from back to front before purling. This shortens the distance the yarn travels. But be aware that the mount of the yarn over has changed when it’s worked in this manner and will need to be worked through the back leg to remain untwisted on the following row.
For a yarn over where the yarn isn’t traveling very far (when working a yarn over after a purl stitch with a knit stitch following), work the yarn over on the barrel of the needle to make it as large as possible.
Closing the Hole a Yarn Over Creates
Sometimes you want to use a yarn over as an increase but you don’t want the resulting hole. For example, I like to use yarn overs to increase for the toe on a toe-up sock (because I find Make One increases more difficult to work on thin yarn and needles and don’t really want the bars created from using a KFB). While I like to use yarn overs in this situation, I certainly don’t want the decorative hole that’s created from working this stitch.
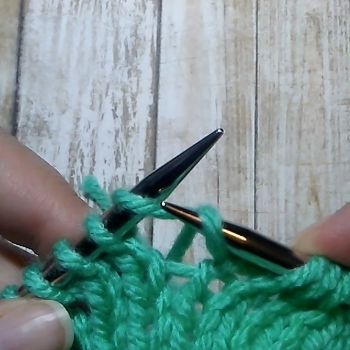
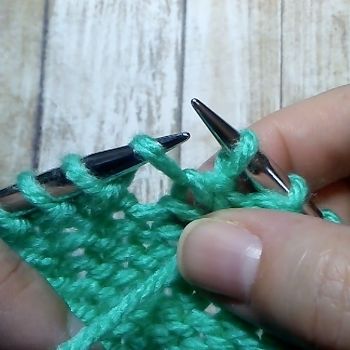
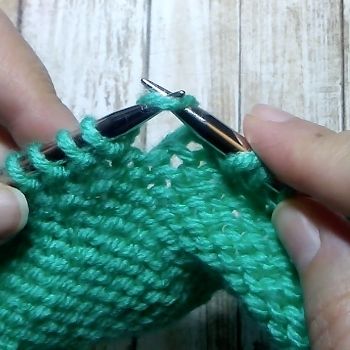
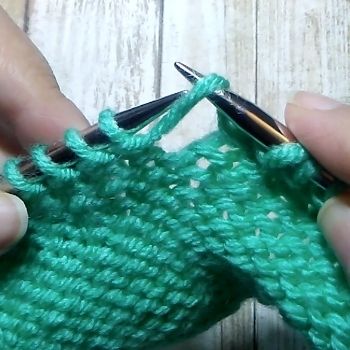
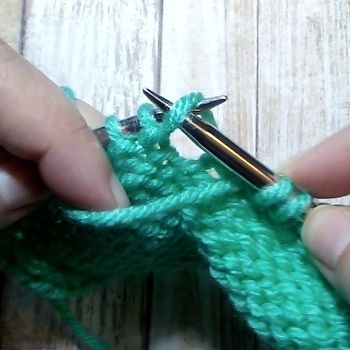
To close the hole, all you need to do is knit (or purl) into the back leg. This twists the yarn over to close up the hole. The resulting twist leans off to the left (see image 3 below). In the example below, the yarn over was created on a knit row so on the next row, a purl row, it’s purled through the back leg.
Note: this isn’t a perfect fix – there will still be a small hole. If you want an increase without a hole, try the lifted increase method.
Read more: How to Increase in Knitting (Essential Increases for Every Knitter)
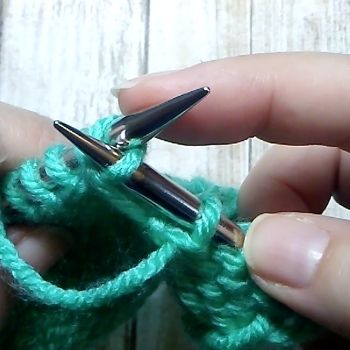
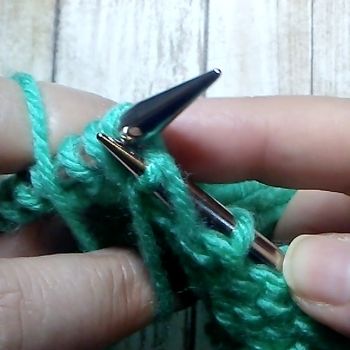
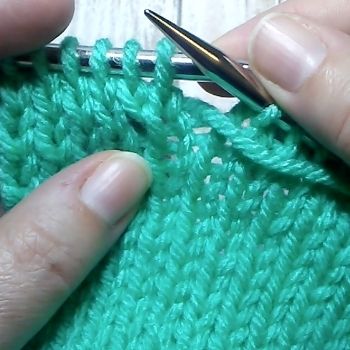
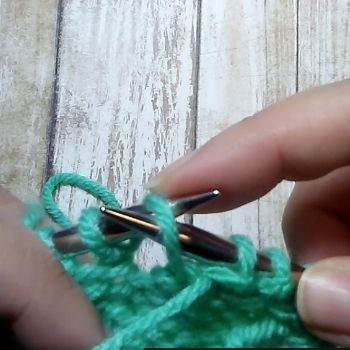
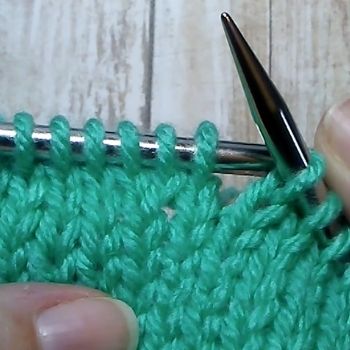
If you want the twisted yarn over to twist to the right, the yarn over needs to be reseated with the left leg to the front of the needle and the right leg to the back. When it’s in this position, you can knit or purl into it and it will twist the yarn over closed and will lean to the right (see image 4 below).
In the example below, the yarn over was created on a right-side row. On the next row (the purl row), insert the right needle into the yarn over knitwise and slip it to the right needle (see images 1 & 2 below). Place this stitch back onto the left needle in this new stitch mount and purl into the front leg (see image 3 below).
Other ways to use Yarn Overs
While we have thoroughly covered the basics, there are more ways that yarn overs are used in knitting. Yarn overs can be worked into stitches to create more increases, wrapped multiple times to create elongated stitches, and to create more increases. They are used in Brioche knitting, to create short rows, and added to bind-off stitches to create a stretchy bind-off edge. Here are just a few ways to use yarn overs:
Multiple Yarn Overs
Sometimes patterns will instruct you to wrap the yarn multiple times when creating the yarn over. This could be for a few different reasons.
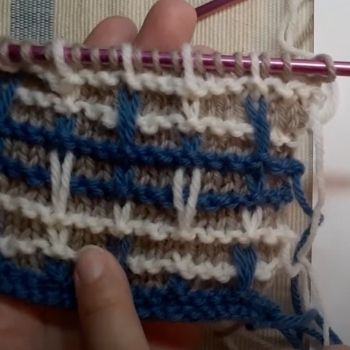
The multiple wraps could be used to create elongated stitches. In the image below, the elongated stitches required the yarn to be wrapped three times around the needle. On the next row, only one of the wraps was worked and the others were dropped, creating the extra-long stitch across the front of the work.
Related video: How to Knit the Broken Plaid Stitch Pattern
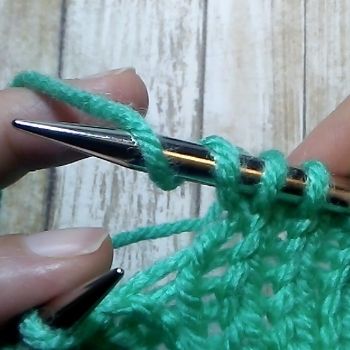
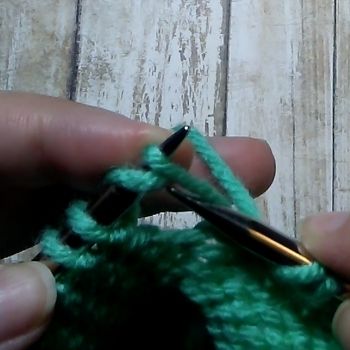
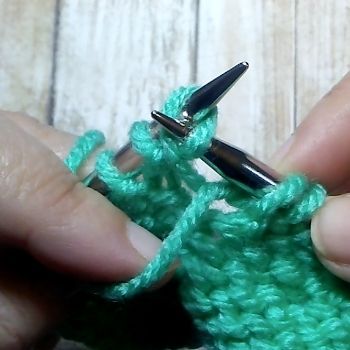
Multiple yarn over wraps can also be used to create extra increase stitches. If that’s the case, you will knit or purl each wrap. For example: if you wrap twice, your pattern may instruct you to knit the first yarn over and purl the second. The resulting eyelet hole will also be larger (see image 4 below).
In the example below, the yarn was wrapped around the right needle twice (image 1). On the next row, the first yarn over was knit (image 2) and the second was purled through the back leg (image 3).
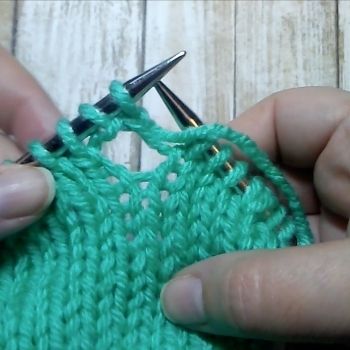
K-YO-K
The ‘K-YO-K’ (knit, yarn over, knit) is a common increase that takes one stitch and turns it into three stitches. It’s commonly used to shape crescent shawls where double increases need to be worked along each right side edge. It can also be expanded to increase an additional four or even six stitches from one stitch (all you do is add more yarn overs and knit stitches in the one stitch).
To work a K-YO-K, insert the right needle into the first stitch on the left needle as if to knit, wrapping the yarn and pulling the new knit stitch through (image 1 below) while keeping the old stitch on the left needle. Now wrap the yarn to create a yarn over (see image 2) and insert the right needle back into that stitch on the left needle and create another knit stitch (image 3). Now that you have three stitches, let the old stitch drop off the left needle. As you look at the stitches on your right needle, you’ll see three new stitches coming out of one stitch (image 4).
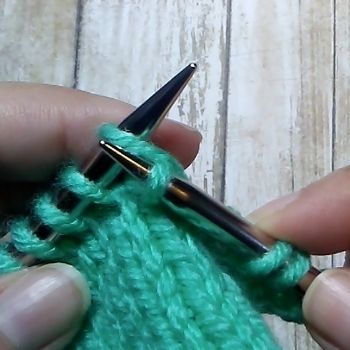
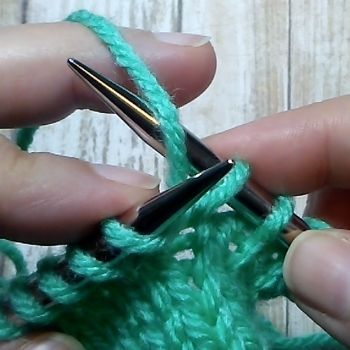
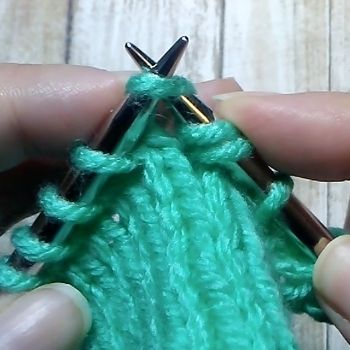
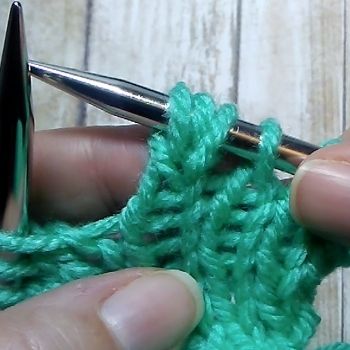
On the next row you will either knit or purl the stitches, depending on the fabric you’re creating.
This technique can also be worked on the purl side of the work and may be abbreviated ‘P-YO-P’ (purl, yarn over, purl).
Using Yarn Overs to Create Dropped Stitches
If you want to drop a row of stitches (often used to create decorative patterns), a yarn over is commonly used at the location the stitches will drop to. Work a yarn over at the location required, work the necessary number of rows and, when you are ready to create the decorative ‘ladder’ drop the stitch off your needle and let the column of stitches drop down to the yarn over.
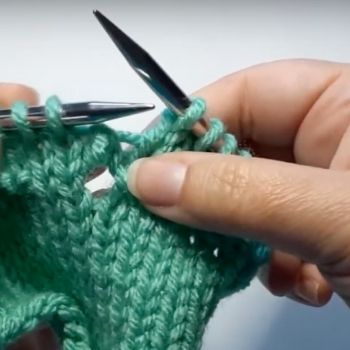
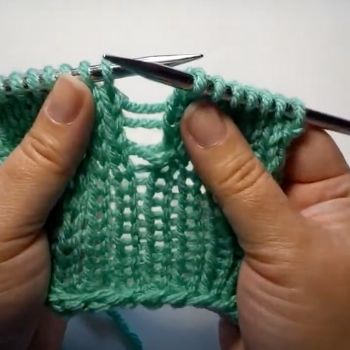
As you can see, yarn overs are versatile tool in your knitting toolbox. There are so many ways they can be used – to create increases, decorative lace, elongated stitches, and even for stretchy bind-offs. For further information on yarn overs, take a look at the resources listed below.
Some links are affiliate links – I may receive a small commission at no extra cost to you if you click through and make a purchase; see the disclosure policy for more details.
Recommended Resources
- Vogue Knitting (available on Amazon)
- The Principles of Knitting by June Hemmons Hiatt (available on Amazon)
- Increase, Decrease by Judith Durant (available on Amazon)
- “Yarn Over Increases” by Binka Schwan, Cast On (The Knitting Guild Association)
- “Yarnovers in Plain English” by Arlie Kralicek (The Knitting Guild Association)
More Knitting Techniques
- The Basics of Slip-Stitch Knitting
- 5 Basic Knitting Cast On Techniques every Knitter Should Know
- Four Ways to Increase on a Purl Row
- How to Decrease in Knitting (6 Basic Techniques for Every Knitter)
