
Knowing how to increase is an important skill for every knitter. There are many different ways to increase but we’ll focus on the four common increases that every knitter should be aware of. These include:
- Yarn overs
- Bar increases (also called Knit Front Back)
- Make one increases
- Lifted increases (also called Knit Right/Left Loop)
Of course, there are more ways to work increase stitches, but these four methods are the ones I find most useful and use most often. If you only want to learn a handful of increase techniques – I believe these are the ones you should know.
In this article, we’ll take a look at each of these increase methods, how to work them, and when you would want to use each one. There is also a video for each increase that will demonstrate the increase and more tips to help you understand how they work.
What is an Increase?
An increase in knitting terms is creating or adding a new stitch where there wasn’t one before. They can be created between two stitches or they can be worked directly into a stitch. Increases are used for a variety of reasons, including:
- Used decoratively in lace patterns
- For garment shaping
- To add width to a fabric
Most of the increases explained in this post are increases that are worked in knit stitches or in Stockinette fabric, which is the most common method because it’s easier to work out the placement and determine how the increases look on the right side of the work.
There are actually other versions of these increases that can be used when working purl stitches or if you want to work an increase in reverse Stockinette (or when you want to work an increase on a wrong-side row and the right side of the fabric is Stockinette). The yarn over is the exception – a yarn over is worked in the same manner (the only change is the distance the yarn over travels when moving between knit and purl stitches).
Mirrored Increases
Some increase stitches slant to the left or the right so they can be placed to follow the slant of the fabric (which is often referred to as blended increases as they ‘blend in’ with the slant of the fabric). Or they can be placed so they lean towards the slant (sometimes may be referred to as ‘full-fashioned’).
Usually, you will find that these types of increases are worked in pairs. For example, a left-leaning increase may be placed along the right edge of the fabric and, to mirror that increase, a right-leaning increase is placed along the left edge of the fabric on the same row.
Non-slanting increases can also be used in pairs in the same way to create mirrored increases.
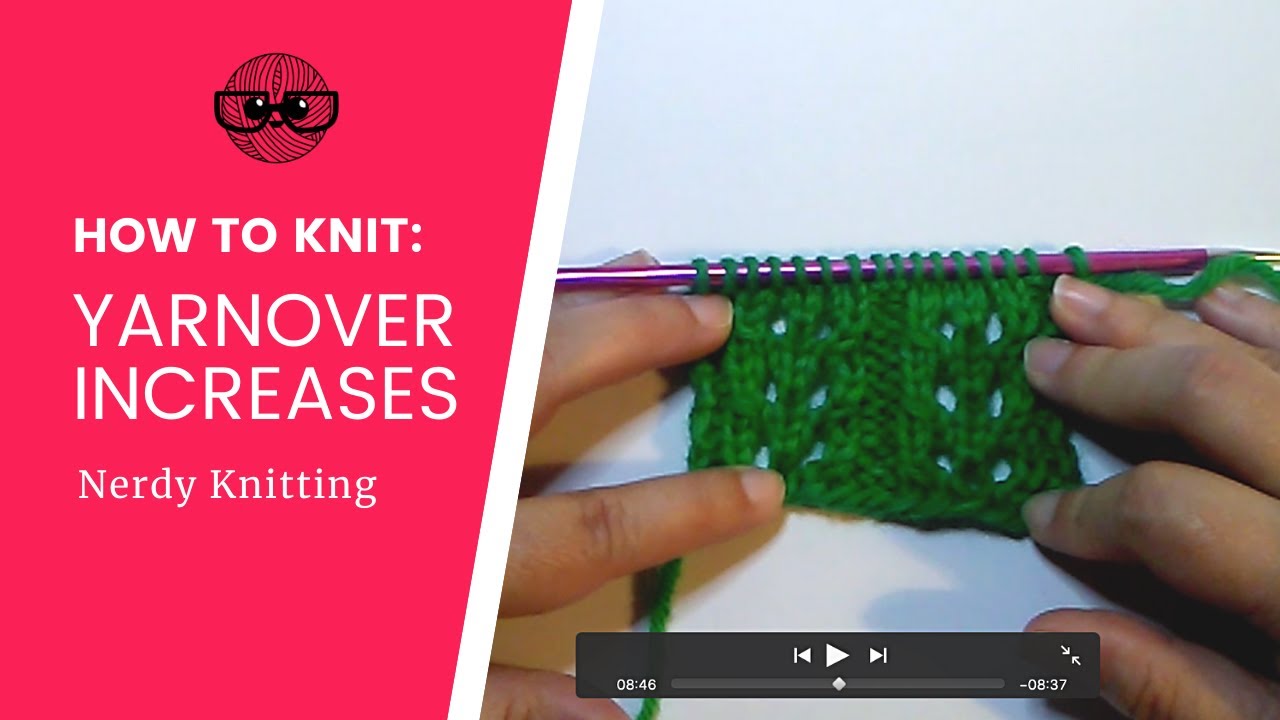
Yarn Over Increases
A yarn over (commonly abbreviated as ‘yo’) is often one of the first increases new knitters use (thanks to the very popular Grandma’s Favorite Dishcloth) and it’s very simple to do. To work a yarn over bring the working yarn to the front, between the right and left needles. Then move the yarn up and over the right needle (image 1 below). That is a yarn over. After the yarn has moved up and over the right needle, you are ready to work the next stitch – whether that’s a knit or a purl.


A yarn over always moves in the same manner, no matter whether it’s a knit or purl worked before the yarn over or a knit or purl worked after a yarn over. You will find that the yarn has to travel further around the needle for some combinations (especially when it’s worked between a knit stitch and a purl stitch).
- If a yarn over is worked after a knit stitch and another knit stitch follows, the yarn is brought between the needles, up and over the right needle and then the knit stitch can be worked.
- If the yarn over is worked after a knit stitch and a purl stitch follows the yarn over, the yarn is brought between the needles, up and over the right needle, and then brought to the front again to work the purl stitch.
- If the yarn over is worked after a purl stitch and a purl stitch follows the yarn over, the yarn is already in front so it just needs to be carried up and over the right needle before coming between the two needles again to work the next purl stitch.
- If the yarn over is worked after a purl stitch and a knit stitch follows the yarn over, the yarn is already in front so it just needs to be brought up and over the right needle where it’s in position to knit the next stitch.
After working the yarn over, you’ll notice that it leaves a hole in your work underneath the place where the yarn over was created (see image 2 above). This is a normal feature of the yarn over and is why this stitch is used in lace knitting – the holes can be used to create decorative designs in the lace fabric. When paired with a single decrease, it’s also a great option for a buttonhole.
On the next row, when you come to the yarn over, treat it like any other stitch and knit (or purl – if that’s what the pattern calls for) the yarn over just as if it were a normal stitch. It is possible to close the hole created by the yarn over by working through the back leg of the stitch – which will then twist the yarn and reduce the size of the hole. Pattern instructions will tell you if that is necessary.
Funny story! When I first learned how to knit, one of my early mistakes was in thinking that the yarn over was wrapping the yarn around the needle AND knitting the next stitch. The market bag I was making had to be ripped out a few times before I finally realized that wrapping the yarn around the needle was the yarn over (and didn’t actually include the knit stitch that came after it).
Knit Front Back (KFB)
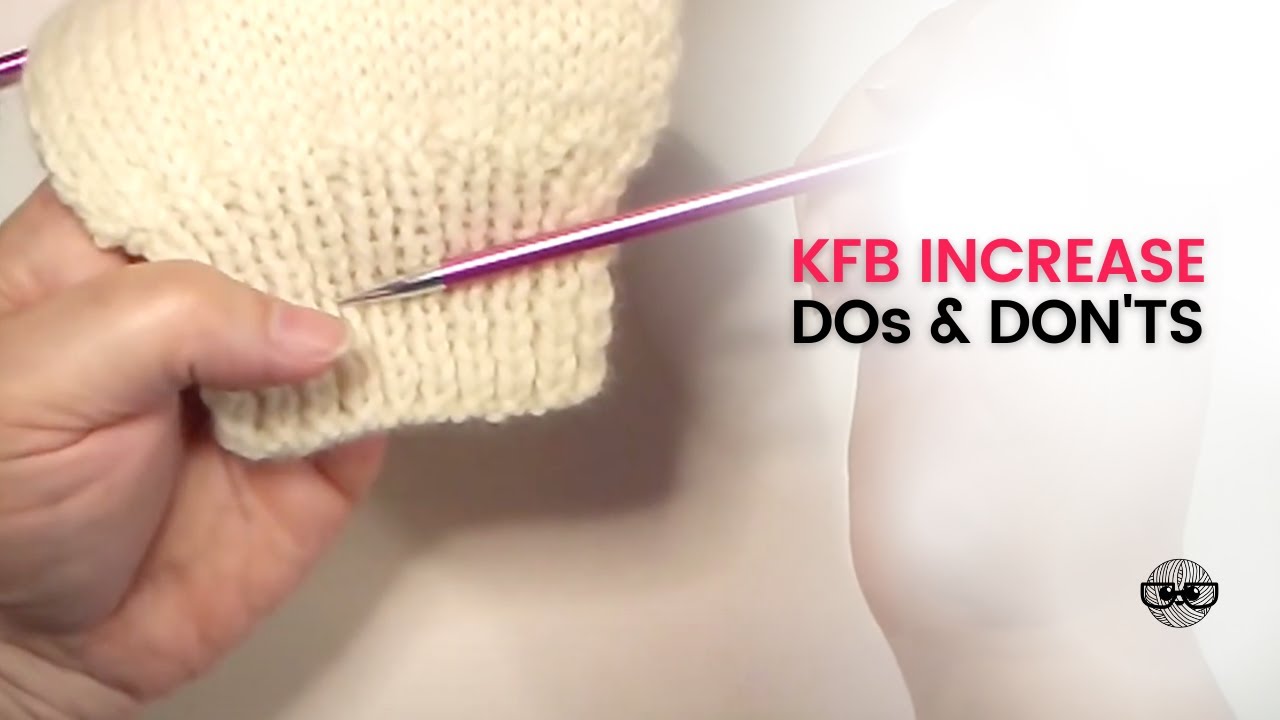
The Knit Front Back (commonly abbreviated ‘kfb’) can also be referred to as the Bar Increase. It’s a common increase that takes one stitch and turns it into two (which is NOT the same as working an increase between stitches) and it’s often one of the first increases that new knitters learn.
To work a KFB, insert the right needle into the left as if to knit, wrap the yarn to form the stitch, pull it through but don’t drop the old stitch off the left needle (see image 1 below). Instead, turn the right needle and insert it into the back leg of the stitch on the left needle and knit it through the back loop before dropping the old stitch off the left needle (see images 2 &3 below).


You’ll notice after working the increase that the second stitch has a small bar beneath the needle (that’s why it’s often referred to as a Bar Increase – see the final image above). This can be a decorative detail, or if you prefer an increase that isn’t as obvious one of the increases listed below may be a better choice (depending on the project, of course).
The KFB increase is perfect if you’re increasing in rib. For example, if your sweater or hat has a section of rib before the Stockinette stitch body and you need to increase in the final row of rib before starting the body. Work the increase in a knit stitch that comes just before a purl stitch and the second stitch and it’s accompanying bar will be hidden in the purl ditch.
If you look closely at the picture below you can find the five bar increases that were spaced across the final row of ribbing.

This increase is also a good choice for Garter stitch or a textured knit-and-purl fabric where the bar blends into the stitch pattern.
If you want to mirror the KFB increase (working an increase at the right and left edges of your knitting), you need to be aware of the bar that is formed when creating the second stitch. If you work the increase in the second stitch at the right edge, the bar is located beneath the third stitch.
If you were to work the increase in the second stitch at the left edge, the bar would be on the newly formed stitch that would be one stitch in from the edge. Instead, you’ll need to work the increase into the third stitch along the left edge to properly mirror the increase at the right edge.
In the image below, the KFB increase was worked in the third stitch from the right edge. To mirror the increase, it was worked in the fourth stitch on the left edge. This creates a clear 3-stitch edge outside of the increases at each side of the swatch.

It’s important to remember that this increase is worked into a stitch. If a pattern tells you to increase evenly across the row, working the increase IN a stitch will require a different number of stitches to space them evenly than if you were to use an increase that is created between two stitches. For more information see the 3:45 minute mark in the video below.
There is a further variation on this increase called the KBF (knit back front) where the steps are reversed. Begin by knitting into the back leg of the stitch, leaving the stitch on the left needle as you bring the right needle to the front. Knit into the front leg of the stitch before letting the stitch drop off the left needle.
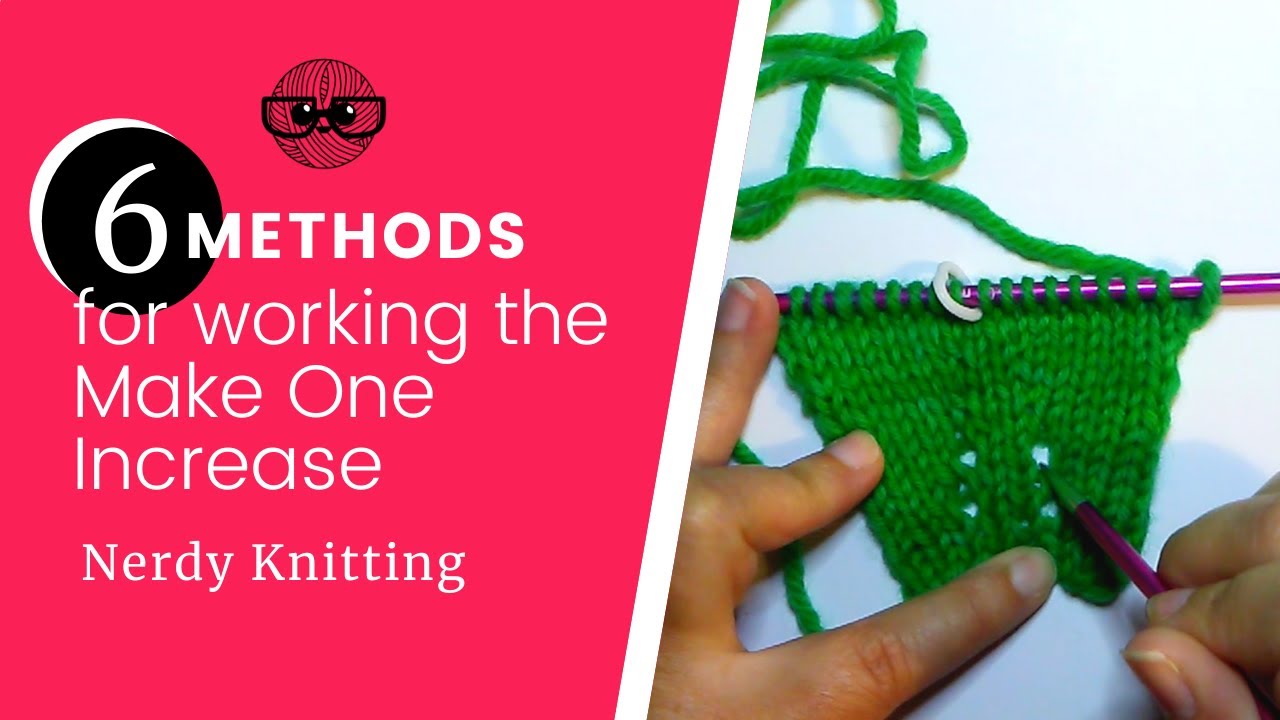
Make One Increase
The Make One increase (commonly abbreviated as ‘M1’ or ‘M1O’ or ‘M1K’) creates a new stitch between two stitches. The basic version of this increase creates an open stitch (which is why it can be referred to as a Make One Open) that is similar to a yarn over (and is exactly the same as picking up a missed yarn over from the previous row).
If you don’t want the hole created from working the open version of this increase, there are two ways to twist the loop to close the hole – the Make One Left (commonly abbreviated ‘M1L’) and the Make One Right (commonly abbreviated ‘M1R’).
To work the open version, locate the running bar between the stitch on the left needle and the stitch that’s located beneath the just-worked stitch on the right needle (see image 1 below). Insert the left needle underneath this running bar from front to back and lift it up onto the needle (see image 2 below). Now work this new stitch as if it were a knit stitch (see images 3 & 4 below).


Make One Left
To twist the open Make One closed so the twist slants to the left, insert the left needle into this running bar from front to back and lift it onto the needle (just like you’re going to work a Make One open). Knit it through the back loop (see the first image below) and the legs will twist and the front leg will slant to the left (see the second image below).


Make One Right
To twist the open Make One closed so the twist slants to the right (see image 4 below), insert the left needle from BACK to front under the running thread, and lift it onto the needle (see images 1 &2 below). Insert the right needle into the front leg of the picked-up bar and knit it like a normal knit stitch (see image 3 below).


While they are both easy to work (the right-leaning increase can be a bit finicky if the bar is tight), sometimes it’s tricky trying to remember if you’re supposed to pick up the running thread from the front or the back for each stitch.
Instead, as you pick up the running bar, pay attention to the direction it’s leaning as it sits on the left needle. If the leg is slanted off to the left, it’s all set to be worked as a left-leaning decrease. If it’s slanting off to the right, it’s ready to be worked as a right-leaning increase.
Once you have that sorted out. Think about how the stitch needs to be worked to close the hole – which will be obvious as you insert the right needle. If the stitch is leaning off to the left and you insert the needle into the front leg you’ll see that it will create an open stitch. Instead, it needs to be worked through the back leg.
If you pick up the running thread and it’s leading leg is slanting to the right, it more obvious that you need to work it through the front leg to twist the stitch closed. If you were to work it through the back leg it would be an open stitch.

The Make One increase is a great option for increasing for shaping in a garment. Since it’s worked between stitches it is easily placed to create paired increases at each end of the same row. But even the twisted versions leave a small hole. If you want to avoid a hole completely, the next increase is an even better choice.
Lifted Increases
Lifted increases are less commonly used in the knitting community in North America (but they are deservedly becoming more popular). It’s one of my favorite ways to increase as I find it to be the increase that is the least noticeable in knit fabric so it’s my go-to method when I’m adding shaping to a garment or when I want the least noticeable increase.
There are two ways to work the Lifted Increase – the Right Lifted Increase (commonly abbreviated ‘RLI’), which is also known as ‘Knit Right Loop’ (and abbreviated as ‘KRL’) and the Left Lifted Increase (commonly abbreviated ‘LLI’), which can also be referred to as ‘Knit Left Loop’ (and abbreviated as ‘KLL’).
To work this increase, first, you must locate the stitch it will be worked in. While looking at the first stitch on the left needle, the stitch that’s just below the stitch on the needle, is where the increase will be worked.

Right Lifted Increase
Once you’ve located the stitch that will be used for the increase, insert the right needle into the right leg of the stitch, pick it up and place it onto the left needle (see images 1 & 2 below). Knit into the leg of this stitch and let it drop off the needle (see image 3 below). You’ll notice that adding a stitch here elongates the right leg of the stitch that was used for the increase (and gives us the right-leaning slant – see the third stitch in image 4).


Left Lifted Increase
To work the left-leaning version of this stitch, you first need to knit the stitch on the left needle so the stitch to be used for the increase is on the right needle – ready for you to use the left needle to lift the left leg and use the right needle to knit into the leg.
It might seem a little confusing the first time you need to work this stitch, but just pay attention to what is happening. There’s no way to work the increase into the left leg of the stitch until you’ve moved the stitch to the right needle.
But, when you’ve worked the stitch on the needle and moved it over, the stitch that is used for the increase has moved down and is now two stitches below the stitch on the right needle. The first time you accidentally try to work an increase in the stitch above you’ll realize the mistake – there’s already a stitch there (the stitch on the needle) and you can’t add another one.
The images below show you which stitch you’re working in to. Find the left leg of the stitch and bring it up onto the left needle (see image 2 below)


Once you have the left leg of the appropriate stitch on your left needle, knit it through the back leg (see the first image below).
This causes the leg used for the increase to become slightly elongated and lean off to the left (see the second stitch in the second image below).


For a full video tutorial explaining Right and Left Lifted Increases, watch the video below.
![How to Knit Lifted Increases - Right (RLI) and Left (LLI) [also known as KRL & KLL]](https://toniaknits.com/wp-content/cache/flying-press/6239215db3361b6c3ceaacab434f4208.jpg)
There are certainly more ways to create increases but I find that these are the most useful and at least one of these techniques can be used in almost any situation where adding stitches to your knitting is necessary.
For further information on this topic, take a look at the resources listed below (some links are affiliate links – I may receive a small commission at no extra cost to you if you click through and make a purchase; see the disclosure policy for more details).
Recommended Resources
- Vogue Knitting (available on Amazon)
- Increase, Decrease by Judith Durant (available on Amazon)
- Knitter’s Handbook by Montse Stanley (available on Amazon)
- The Principles of Knitting by June Hemmons Hiatt (available on Amazon)
- “Single Knit and Purl Increases” by Binka Schwan, Cast On (The Knitting Guild Association)
More Knitting Techniques
- The Basics of Slip-Stitch Knitting
- Four Ways to Increase on a Purl Row
- 5 Basic Knitting Cast On Techniques every Knitter Should Know
- How to Decrease in Knitting (6 Basic Techniques for Every Knitter)